November 5, 2013

Follow your instinct {one-of-a-kind dining set}

Posted by Chelsea


Hi guys! Have you ever tried something a little 'against the grain' and then felt so glad you did? I love stepping out and trying something different! Such was the case with this spectacular dining set I found a few weeks ago. The cane on the chairs was in perfect condition and, while the lines are simple, I felt like the set had so much potential to be stunning. You may recognize it as the set I posted right after I found it, asking if anyone wanted to customize it for themselves. Without any takers I got to have my own way with this dining set.

BEFORE

AFTER


For me, this refinishing job was a gamble. I really wanted to see some dining sets that had black painted chairs with a grey or off white table. It was the direction I'd been leaning toward from the beginning but just wanted to see if there were any examples of that out there in the great world wide web. I'm telling you, I typed all kinds of things in the Google search box and could not find anything like what I wanted to see. Not. A. Thing. I started to think that if there were no examples of this then there may be a good reason why. Maybe folks had tried it and it turned out terrible! BUT, I figured that paint can always be changed and I really felt that this was the right direction to go with this set.


I gave the chairs 3 coats of Graphite by Annie Sloan Chalk Paint. Graphite is an excellent choice if you want to get a really great vintage looking black with a matte finish. I wanted the cane on the chairs to be highlighted and I think the Graphite achieves that beautifully. To contrast the strength that dark chairs can have in a room I painted the table in French Linen, (a warm grey with a taupe-y undertone), and then worked in a soft whitewash with Old White, both by Annie Sloan Chalk Paint, (to get a whitewash I simply poured about half a cup of Old White in a plastic cup and mixed in a few tablespoons of water - I brushed the mixture on a few widths of the table at a time and then immediately wiped it off with pieces of torn t-shirt). When wiping off the whitewash with the rags, the paint pulled up in areas along the edge which I just let be for a beautifully worn look.


{Set now available for sale}
66"L, (48"L with leaves down) x 36"W x 29.5"H
5-piece set, $615
Contact me if interested!

Thank you for reading!

~Chelsea


November 4, 2013

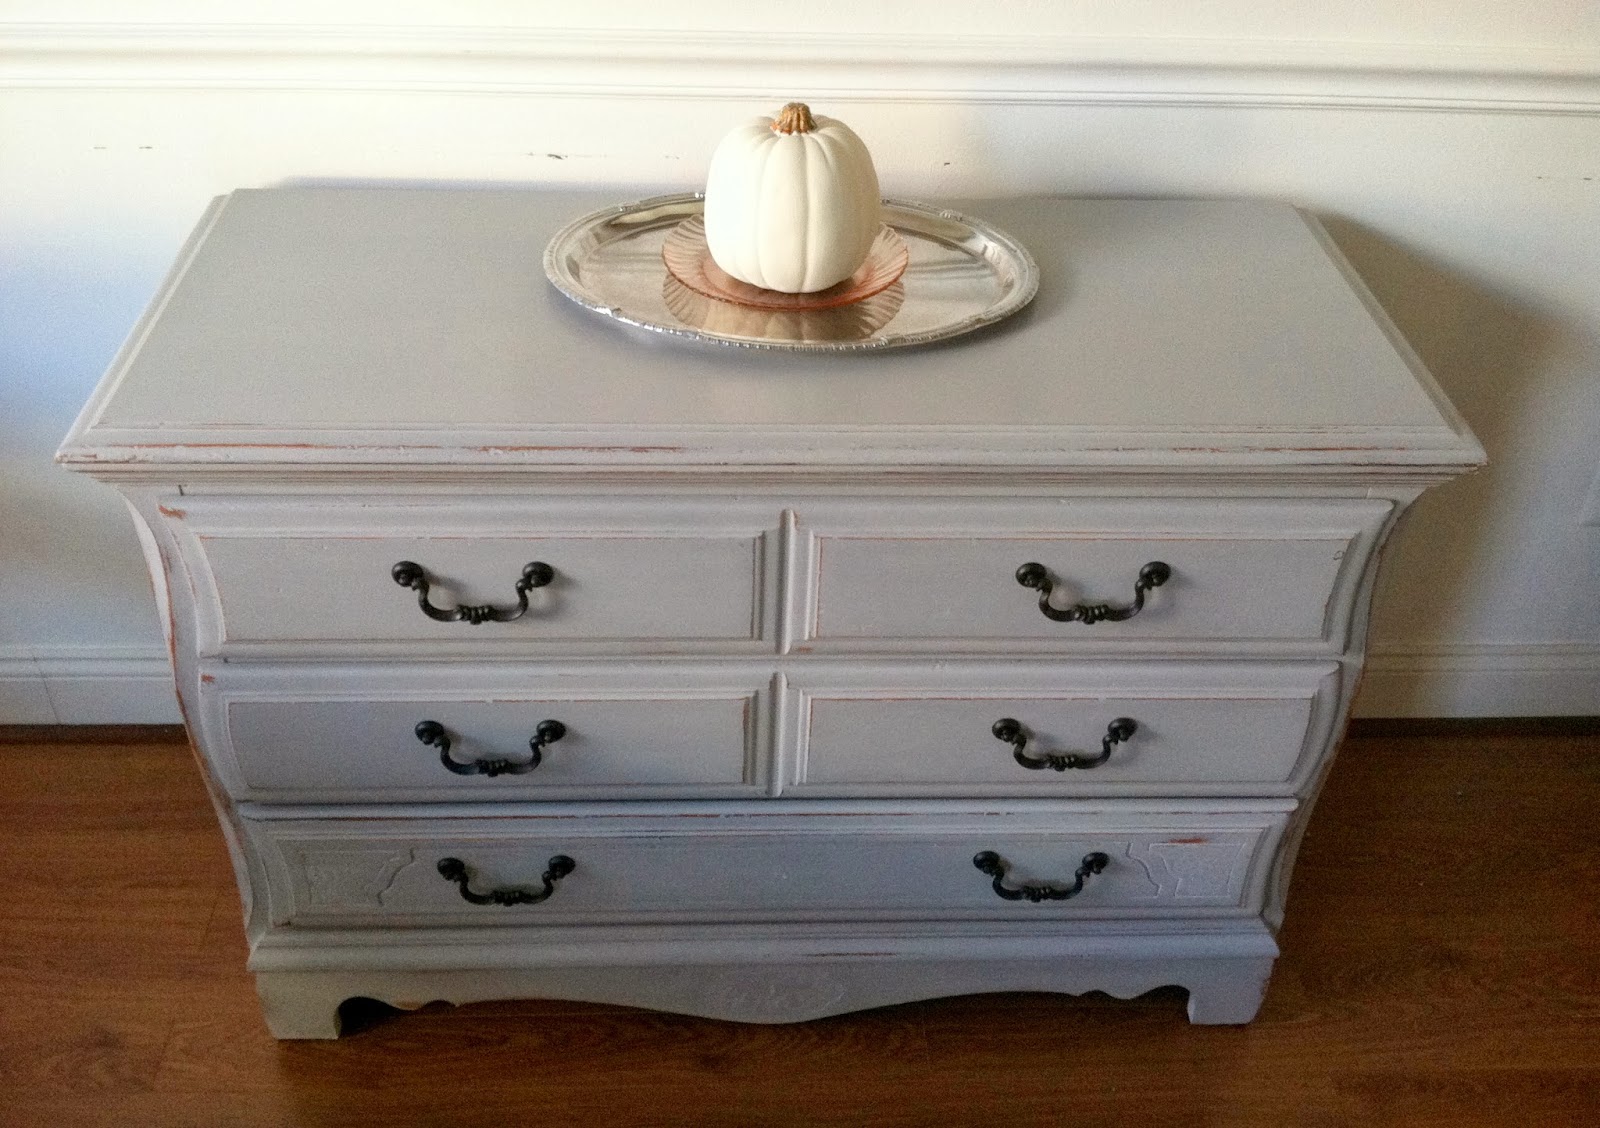
Sweet little dresser {Paris Grey}

Posted by Chelsea


Hey guys! Last week I mentioned that I took the week mostly off from working on my own refinishing pieces...and I did...mostly. But I couldn't resist squeezing in this little one, (well, little compared to the 60" long buffet's that have consumed most of my refinishing schedule in preparation for Thanksgiving)! Someone who was trying to sell it found me and asked if I'd like it. It had unique lines along the edges that I'd never seen before, and a size that I find quite versatile, (can't you see this as a changing table in a nursery?! Or a cozy guest room? Or dazzling in a dining room?). I was sold!


I refinished this piece in the classic color, Paris Grey, by Annie Sloan Chalk Paint. It is a favorite, hands down. You simply cannot go wrong with a soft grey, and as soft grey's go, Paris Grey beats em' all, (and I've used enough to make an informed opinion). Since this piece has soft curves and lines and I chose an equally soft color, I wanted to contrast the softness just a bit with some mild distressing and black hardware, (I simply sprayed the original hardware in flat black by Rustoleum, my go-to spray paint for hardware).


SOLD
40"L x 30"H x 18"D
Contact me if interested in a similarly refinished piece.

Thank you for stopping by!

~Chelsea


November 1, 2013

Friday Love

Posted by Chelsea


A very happy Friday to you! To kick off the weekend I wanted to share my absolute favorite home interior element for today's Friday Love. I'm crazy about exposed interior brick walls in the home. Perhaps it's the city girl in me, but the warehouse, downtown vibe feels exciting and inviting! 


If the industrial style is not really your cup of tea, don't count interior brick out just yet. Take a look at these cozy, cottage styled rooms. The brick adds a warmth and coziness that contrasts nicely with these softer spaces.


Finally, our very own interior brick wall right downstairs in the basement! This is not our 'forever' home and I hope it's not our last with interior brick, but just in case we ever want to try it ourselves, here is an excellent DIY tutorial on adding it!

Thank you so much for reading and have a great weekend, friends!

~Chelsea

P.S. And thank you for your kind comments, (both emailed and posted on facebook), yesterday about Shire's room makeover, (here)! The response was overwhelming, (and a little surprising), so thank you for taking the time to offer your encouragement. Means a lot. :)


October 31, 2013

Shire's room: Mini-makeover

Posted by Chelsea


Hi friends! Whew! This has been a full week of celebration! Over a stretch of 7 days we'll have celebrated 3 family birthdays, 1 bridal shower, (for our very own Cate, who shared with us yesterday her repurposing PINspirations), and of course, an evening of trick-or-treating tonight. It's been busy and beautiful, indeed. 

I decided to take the week mostly off from working on my own refinishing pieces and since I had a few days in between custom refinishing orders, I decided to give my daughters room a little makeover. 

It started with new bedding. As the nights are dropping to the 30s and we're trying to maintain a modest electric bill, Shire simply needed heavier sheets and blankets. Then, of course, one thing led to another...


I found her coral blanket and sheets on Ebay for $10.50, originally Macy's, (though I believe this set has been discontinued as I couldn't find it on their site). The color caught my eye first but the ruffles running down the blanket sold me.

The step stool I found at a thrift store and painted in Duck Egg by Annie Sloan Chalk Paint.

The new bedding came with three pillow cases! I only needed two so I used the extra, along with various scraps of fabric, to make some art for her wall. The large framed piece is wrapping paper that Shire picked out and a verse I painted in the middle, (with a scrap paper bird glued on).


The 'HAPPY' banner I made using cardboard, (from a cereal box), with computer printed letters glued on top and glitter glue on the edge, then made the trim using cream colored crepe paper glued on the back.

I jazzed up her plain, white, Walmart, assemble-yourself bookshelf with some Washi tape. I glued the bookshelf where I wanted the tape to go, then placed the tape right over the glue.
 

My old doll bed from when I was a little girl. I added some decorative moldings to the headboard, (removed from a custom order dresser because they were too feminine), and painted the piece in Duck Egg by ASCP. I cut a piece of 2" foam from JoAnns to make the mattress and slipped one of the pillow cases from Shire's new bedding on to act as a fitted sheet.

I made the headboard when she first moved into her own room, (how-to found here), the white globe light was a thrift store find, (originally from Ikea, and the hanging cord I wrapped in twine), and the butterflies were an antique store find back when Shire was a mere 6mo old.

For other DIY tutorials around the room, (how to make a pallet bed, how to add length to your curtains, please check out my DIY Project Tutorials, found here).

Thank you for reading!

~Chelsea

October 30, 2013

Savior Complex

Post by Cate

So because I am still new to Chelsea's Garage and because we are still getting to know one another, I thought this week I would give you a deeper look into what makes me tick.  I can tell you one fabulously obvious thing about me is that I LOVE the idea of "rescuing" pieces.  Maybe it's my savior complex, but I love finding something... anything with potential and giving it its chance to shine.  In fact, I have a whole pinterest board dedicated to taking one thing and repurposing it as another.

Thus the PINspiration for this week's post: my favorite repurposing ideas.  Below are a couple of highlights from my favorite pinterest board - hopefully they will inspire you to see old things in a new light!

Wire Baskets {as shelves}

wire basket shelving

Radio Dials {as a coat rack}

Vinyl-player-hanger

Tea Tins {as magnetic store-alls}

tea tins...BOOM

Desktop Organizer {as dry food wall storage}

doing this

File Cabinet {as kitchen island}

filing cabinet island

Tree Branch {as a clothing rack}

Tree Branch Hanging Coat Rack

Terracotta Pots {as a living wreath}

Living wreath

Now it's your turn!

~Cate

October 29, 2013

Happiest Birthday

Posted by Chelsea


Happy 4th Birthday to my dear ones.

Coming up this week: A mini-makeover to Shire's room, a dining table w/ set of 4 chairs available for sale, and a credenza which I'm gonna offer as a custom order to anyone interested. Stay tuned!

Thanks for stopping by, friends!

~Chelsea


October 25, 2013

Friday Love

Posted by Chelsea


Sorry guys. I know this weeks Friday Love is not very applicable to many, (any?), of you right now. But as our twins are nearing their 4th birthday in a few days, (October 29!),  this Momma's heart is just a puddle of mush as I reminisce what our life was like 4 years ago. Expecting twins was scary, especially as new parents. Then they were born.....and our fears were validated. :) It was, and is, a lot to swallow each and every day. But our loving God has been so faithful in meeting each of our fears and uncertainties with mercy and guidance. What grace!

Now I'm getting weepy so I'll move on! Although our twins, Colin and Shire, are not only in big kid beds but also separate rooms now, my heart still melts when I see two cribs in one room. It's magical! Take a look:


See?

Though the days of buying two of everything and twice the amount of diapers are somewhat behind us, I will never forget the magic of bringing home two babies.

And this will probably not be the only throw back photo I share over the next week. I can't help it, I'm not thinking about much else but my babes and celebrating the awesome little people they've become. Anyhow, I was pretty proud of this little self feeding contraption I made using rolled up burp cloths and rubber bands around their bottles. This was around the time I found out I was pregnant again and started thinking of ways to give myself an extra hand.:)

Have an extra wonderful weekend!

~Chelsea