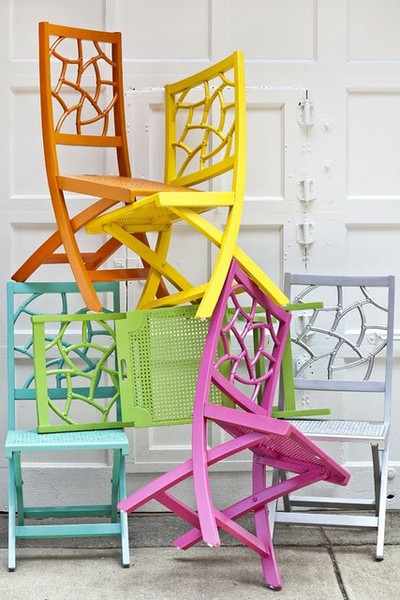
Showing posts with label furniture refinishing in Northern Virginia. Show all posts

July 8, 2014

Back from vacay!

By Chelsea


Hi friends! Gee-whiz, this last week away from the blog has felt so long, (to me at least. You probably didn't notice)! Usually when the blog is quiet for a whole week I'm either working on something HUGE, or absolutely nothing at all. In this case it was the latter. We spent a beautiful week at my grandparent's lake house with the whole family. We relaxed in the hot tub, drifted on inner-tubes on the lake, nearly died on inner-tubes on the lake, skied, played games, watched soccer, took walks, and ate lots of deliciousness. It was a wonderful time of being together and I am so grateful for the time away. Here's a little photo recap of our week; a glimpse into life happening.

This is where we were - Deep Creek Lake. My beautiful sister took this amazing shot!

These guys. Doesn't get any better to this Momma.

That's a happy 4-year old face right there!

Every day, doing as we please.

Floating 'business' meeting with Cate

Cherishing time with these girls


S'mores. And s'more and s'more...

And where there were s'mores, there were dogs. :)

My love

Skiing after the storm

Dad time.

Coming up this week, a simple dresser gets completely transformed thanks to ScotchBlue painters tape, and I've got a sweet and simple DIY hostess or birthday gift.

Thank you for stopping by! Missed you all!

~Chelsea


June 11, 2014

Sale recap!

By Chelsea


The 5th Chelsea's Garage sale this past Saturday couldn't possibly have fallen on a more beautiful day!

Cate and I squeezed in this shot together right before the day got rolling. She managed to look effortlessly fresh and beautiful throughout the entire ordeal. I was already sweating at this point. Like a guy.

Luckily, I went through and snapped some pictures of the garage the day before, because once we opened the door, it was game on! As with the previous sales, there were guests waiting at the front of the house an hour early, (hence, my sweating).

Here's a little tour around the 'shop', as it looked on Saturday:


My favorite part of the day, and really, the whole reason I host these garage sales every now and then, was getting to meet and mingle with the friendly faces who came out. Some old friends, some brand new. This was one of our younger guests, practicing excellent patience while his Mommy and Daddy looked around. So, so sweet. :)


We've said goodbye to a hefty handful of pieces since opening the garage door last Saturday morning, but there are still some beautiful pieces left waiting for a new home! Please check both of the Available for Sale links on the right hand side under, 'New? The fun starts here!'. Those pages will be updated frequently as new pieces become available and old pieces go, so check back often! And of course, custom orders are always an option if you have a piece of your own that you'd like to refresh!

Coming up tomorrow and Friday I've got a brand new DIY rug tutorial, as well as an amazing online retail shop selling gorgeous handmade items, (for home, little ones and you), for a great cause. You're gonna love it; I can't get enough!

Thank you all for stopping by!

~Chelsea


June 4, 2014

My first 'Take-two'!

By Chelsea


Three days until the 5th Chelsea's Garage sale! Here's today's sneak peek:

Sometime last week I posted a photo of this piece that I picked up at the Habitat for Humanity ReStore:


It felt like any other first meeting with a new piece: "Why, hello there; let's check you out. Mmm-hmm, you got it goin' on. Good bones, kickin' body. I would looooove to get my hands on you; are you spoken for? You're not?! Well then let's go, I'll pull my car around and pick you up. What's that? You don't think you'll fit in my minivan? I assure you, there's nothing 'mini' about it; it's pretty spacious with the seats out. C'mon. My house isn't far and my husband won't mind."

Then, after a few drinks, (of water), I went to the garage to remove the hardware from my new piece, (bow-chicka-wow-wowww). In that instant, I realized we had met before. Months ago. How embarrassing!!

Let's take a quick walk down memory lane. I found this piece at Goodwill last fall:


Turned it into this:


And it became a highly praised and shared Before / After feature on Apartment Therapy, catapulting the piece to hundreds of boards all over Pinterest. I couldn't believe it!!

So, when I started to recognize this new piece from the ReStore, I flew to the computer to look at photos of the previous piece I'd done last fall. Every detail is exactly. the. same. In 4 years of refinishing furniture, I can't recall ever finding a duplicate piece. I felt ridiculously giddy as soon as I realized I was getting a 'take-two' opportunity with one of the most popular pieces to come out of my humble garage!

After some back and forth, I decided to go in a totally different direction this time. A little quieter, softer, and slightly more versatile:


I couldn't use the original hardware; it was missing too many pieces and wasn't quite the look I was going for. After browsing some options online, I decided on these beech wood pulls from ATG Stores which I think add stunning contrast to the crisp white.  It's the natural wood that gives the entire piece a down to earth feel.


Gentle distressing over a crisp white piece is my favorite. There's a warmth and coziness that distressing adds, even to this Pure White by Annie Sloan Chalk Paint.


Before / After, Take-two

My first After / After

Pretty different, right?! Both good saves, in my utterly biased opinion. Find this and other one-of-a-kind beauties this coming Saturday! Cate and I will be selling two months worth of refinished pieces right out of my garage-turned-showroom. We are so excited to see and meet all who can make it!

(Please contact chelseasgarage@gmail.com for the address. Cash or Check are accepted)


Thank you for stopping by!

~Chelsea


May 30, 2014

Quick boho lighting

By Chelsea


Whew! Finally Friday and now we're one week away from the Chelsea's Garage sale next Saturday, June 7! When I saw this pin by Mandi of Vintage Revivals, I was instantly inspired to make some unique, hanging lights for our garage during the sale, (I'm a picky pinner, but if you follow me on Pinterest you'll likely find me attempting many of my pins here)! Illuminating a garage is tricky and I'm always looking for new ideas that are quick and inexpensive, but still complimenting the unique and beautiful gems that will be available on sale day.

While throwing my version of this light fixture together I didn't intend to feature the final product. But it turned out so much cuter than I thought! It was a super easy, ridiculously cheap project; totally worth sharing.


First, I just want you guys to know that I understand so many of you are starting with absolutely nothing. It's incredibly touching to receive emails from those of you who are just getting out on your own for the first time, or are starting fresh, whatever the reason. It is absolutely a pleasure to share and inspire unique design ideas that truly are inexpensive and easy for the average person with a real life budget and not a lot of time to DIY. This post is most definitely dedicated to you, for what it's worth. :)

So here's a budget friendly, time friendly hanging light idea that doesn't skimp on style, (staged in our guest 'nook', see full room tour here)!


What you need:

-Embroidery hoop, (found in the $2 range at Michaels, JoAnns, and Walmart)
-Pendant light cord, (the kind that plugs into the wall is easiest, less than $10 from most hardware stores)
-Beaded necklace, (free if you have one you want to sacrifice - optional for this project)
-Gold spray paint, ($3 at most hardware or craft stores - also optional for this project)

Instructions:

Spray paint the light cord, (spray the whole thing, unlike me. I was at the end of my can of gold spray paint and it sputtered out with 1/3 of the cord left, as you can see). You'll have to do this in several steps, letting one side dry, then rolling it over and spraying the other side. Wrap the necklace around the neck of the light socket and tie and tuck into place. Tie the cord around the embroidery hoop about 5" above the neck of the socket. Screw in a white light bulb. And voila! You're done! How you want to hang this is completely up to you - you can either hang a simple command hook on your wall, (they have metallic ones now!), and loop the cord over the hook and plug into the closest outlet. Or you can screw a hook into your ceiling, hang the cord from there, then tap in some wall staples to hold the cord into place along the ceiling and down the wall. (Tasteful) exposed cords are in, baby! Especially bright or metallic cords. I'm totally embracing this trend.


I've got a couple of these made already to hang around the garage on sale day. Are you stopping by, local friends? Please do! My sister-in-law, Cate, and I have been refinishing up a STORM and will have gorgeous pieces available for browsing and taking home. You'll find dressers, buffets, desks, coffee tables, accent tables, accent chairs, benches, lighting, rugs, and various homemade home decor accents. If you follow CG on facebook you may get a few more sneak peeks over the next week ;) So save that date, June 7, grab some friends, and come on over for a fun time!

Chelsea's Garage sale
Saturday, June 7
9am-3pm
Herndon, VA, (email chelseasgarage@gmail.com for the address)

Have yourselves a wonderful weekend!

~Chelsea


May 28, 2014

Bold vs. Safe {5 tips on picking the right paint color}

By Chelsea


Hi friends! The topic for this post hit me hard the other day when I was staring at these two pieces, (both for the sale on June 7!), pondering how to refinish them.


 Even those pieces which I intend to refinish and sell typically have a clear direction in plan from the moment I see them. It's either, "Oh yes. This will be a stunner in French Linen!" or "Spring Mint. Hands down." But every once in a while I'm as torn as trying to decide on which Ben & Jerry's masterpiece to bring home from 7-Eleven, (we've all been there; I'm not ashamed).

And I know a lot of you have had this predicament as well. I get this question weekly: What color? Whether it's your great-Aunt Nillie's curio cabinet or a worthless dresser you found for nothing at a yard sale, you face a big decision if you intend to have the piece refinished or refinish it yourself. 

What color???
Source: shopstylesociety.com
For anyone out there asking that question right now, or perhaps in the near future, here are a few tips off the top of my head that may ease your decision making process. Here we go, in no particular order:

1. Take some good photos of your space and spend a bit of time looking over them. I think we see our rooms differently through pictures than in the day-to-day passings from room to room. The question of what color to paint a piece should start by assessing the space it will go. You may have seen a smear of Orange Sky by Benjamin Moore in House Beautiful and think it's a lovely shade of yellow, but can your space handle such a powerful color? Show your photos to a trust-worthy friend, (whose style and taste you admire), and ask their opinion. Fresh eyes are always helpful.

Source: Chelsea's Garage
Helpful tip: Chelsea's Garage is a great source for fresh eyes. Send a photo of a space you'd like advice on, (whether it's help trying to decide on a paint color for a new piece or even furniture arrangement), and we'll reply quickly with our thoughts!

Source: inthefunlane.com


2. Do a Pinterest or Google Image search of similar pieces to yours, painted. You may just see a photo that hits you deep within and you know that's the direction you want to go with your piece. When I saw this pink table by Holly of In the Fun Lane, I knew I wanted to do something similarly fun and bright in our otherwise neutral dining room, (keep reading)!

3. Give yourself a quick psyc exam: Do you have a history of making big, bold style choices that have affected you positively and increased your confidence in your unique taste? If yes, then go bold! You can handle it so be brave and take the leap. If you're thinking, 'not so much', that's okay! Then there's no dilemma! Go easy on yourself and choose a soft neutral that you know you'll like. There is no sense in trying to like a look that you know isn't you.

For the neutral lovers out there, here are a few of my favorite Annie Sloan Chalk Paint neutrals: 
Old White, (shown below), Paris Grey, French Linen, and Country Grey.
Source: Chelsea's Garage
4. On the fence? Be bold and safe at the same time with a color that works well as a neutral. When I decided I wanted to do a bright color in our otherwise neutral dining room, I chose this aqua, (Duck Egg by Annie Sloan Chalk Paint), because to me, it does work like a neutral. Colors that are very earthy and natural are like chameleons - you can slip them into just about any color scheme and make them work well.

Source: Apartment Therapy, (from our Home Tour)

Source: Chelsea's Garage


Another color that I love using as a neutral is Chateau Grey, also by ASCP. It's the color of moss; you can't miss with that!

5. Let the piece speak for itself. When I'm working on a true antique, I like to maintain its character by using a classic, soft neutral. This is one of the reasons I love working with Annie Sloan Chalk Paint. Annie Sloan has studied the history of color, primarily throughout Europe. If I'm going to paint over a rich piece that has stood the test of time, I like to respect the age and era it came from by using an equally rich and classic color.

Recognize this one from the first picture up top? It spoke loud and clear and I ended up using French Linen by Annie Sloan Chalk Paint.
Source: Chelsea's Garage

If you ever want some help deciding on a paint color for a piece of furniture, contact chelseasgarage@gmail.com; we're here to serve!

Thank you for stopping by!

~Chelsea