Showing posts with label distressed mint furniture. Show all posts

February 21, 2014

Any takers?

By Chelsea


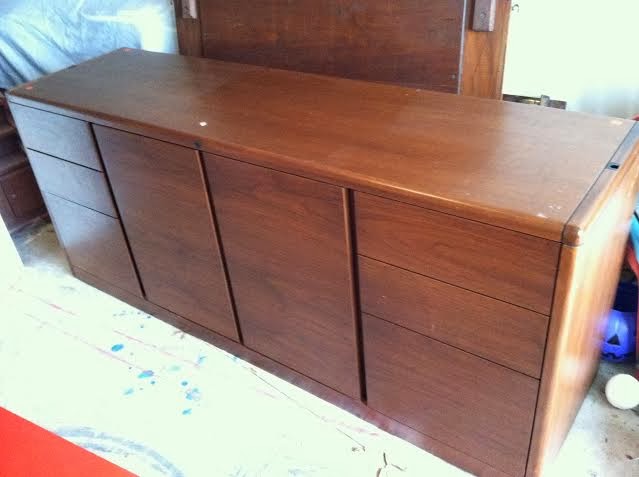
Hey guys! Sorry to pop in and out so quickly today but I just wanted to share this beast that I recently acquired and see if anyone would be interested in putting in a custom order. It's incredibly sturdy with a metal interior body, (as you can see in the picture of the drawers), and boasts more storage than any other buffet style piece I've refinished yet! Every drawer has a lip for easy opening, though hardware can be added at request. So if you're in the market for a big ol' buffet, (or media center or office storage), let me know!

70.5"L x 29"H x 19.5"D
Price to refinish is $485, (before adding hardware if requested)


I refinished a similar piece to this one last year. Remember this beauty?


Don't ever underestimate paint! If you're interested in placing a custom request for the piece please don't hesitate to email me; I'm ready to get started!

Thanks for stopping by and have yourselves a splendid weekend!

~Chelsea

P.S. Thank you so much to those who have voted for Chelsea's Garage in the Homies Awards by Apartment Therapy! If you haven't yet and would like to just follow THIS link, find Chelsea's Garage on the list, and click on +1. There are incredibly talented bloggers nominated for the Home project / DIY category already and I definitely don't hope to win at this point with one day left. But I'd love to be closer to the top of the pack. :) Thanks, everyone!!!

September 24, 2013

Distressed Mint Buffet, {the detailed transformation}

Hi friends! Today I've got an awesome transformation of a really dull piece with lots of potential into something extraordinary. I took lots of pics along the way so you could really see what goes into a makeover and take notes for yourself if this is an interest of yours as well. To start, you need a piece of furniture.:) I look for things that are structurally sound, heavy, sturdy, but also just really interesting. Chunky pieces typically catch my eye and unique details that set a piece apart from others I've seen. (Things that don't matter to me: type of wood, color, hardware, scratches/nicks/chips)

This large buffet I found at Goodwill hit everything on my checklist for a piece to transform


Though seasonally appropriate at the moment, the iron leaf knobs were not lining up with my vision for this piece. 

So I easily removed them with a screwdriver.

The new hardware I got required smaller holes, which meant I needed to fill in the existing holes.


I plugged the old holes up with Elmers Wood Filler.


While I waited for the wood filler to dry and harden I got to work sanding the edges of my piece just to smooth over all the rough spots. I used 120 grit sandpaper.

Once my wood filler hardened I could sand it down smooth. Sand in all directions; circular motion, left to right, up and down - you want to make sure it is a completely smooth surface.


After all the sanding was done I brushed on my first coat of paint. In this case my first coat was Duck Egg by Annie Sloan Chalk Paint. First coats of paint do not have to look good. You can paint like you did in third grade.:)


After my first coat dried I began my second coat - for this piece I layered two colors, so my second coat was Spring Mint by Behr. On large surfaces like the top, I like to brush in circular motion followed by an even back and forth motion.


Once the paint dried completely I distressed along the edges, corners, and areas of the larger surfaces using a medium grit sanding block. After wiping the dust off I used a clean rag to wipe on an even coat of Minwax Polyurethane clear semi-gloss.

After the sealer dried all that was left to do was replace the drawers and doors, attach the new hardware, (after careful measuring), and bring the finished piece inside for it's glamour photos!


{66"L x 29"H x 19"D}
Piece has sold. Please contact me if interested in something similar!

Thank you for stopping by!

~Chelsea