January 31, 2013

Wall art

Funky shelf now...

...rickety chair just days ago!

The same lovely gal that dropped off the rusty door, (that we made into a bench), also brought this chair - and if I recall, one of her first instructions was "to go crazy with it" :) After a lot of attempted repair, I realized it was not going to be able to withstand much weight as a place to sit. I did some research to see how to best, (most tastefully), salvage the backrest of the chair since that's the most appealing part. I came across a couple options and my client really liked the idea of attaching a shelf - so that's what I did! 


{done as a custom order, happy to do more if there is interest!}

The Low-Down:
-Sawed the back rest of the chair where the vertical sides met the seat
-Measured the space between the vertical sides and cut an old piece of fence scrap wood to fit inside
-Nailed through the vertical sides to hold the shelf in place
-Attached nailheads around the engraved circle at the top for a little rustic elegance
-Attached a sawtooth hook at the top of the backrest to hang the piece on the wall

Do you have any objects in your home that you are using in an unconventional way? Please share! It's fun to learn how to use something you may have thought about getting rid of!

~Chelsea

January 29, 2013

When one door closes, make a bench!

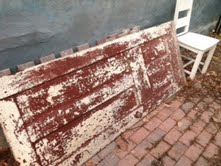
There is a special kind of thrill from building a piece of furniture from scratch. Designing, measuring  marking, cutting, nailing...it's serious business and major fun at the same time! I didn't know this when a dear client approached me about turning an old door that she found into a bench. I was leaning towards declining for fear of disappointing her vision. Thankfully for me she was persistent and open minded.

Before I knew it I was knee deep in something new and slightly terrifying!
{Before}

A little fear can be healthy, as long as it doesn't stop you from trying.
{After}


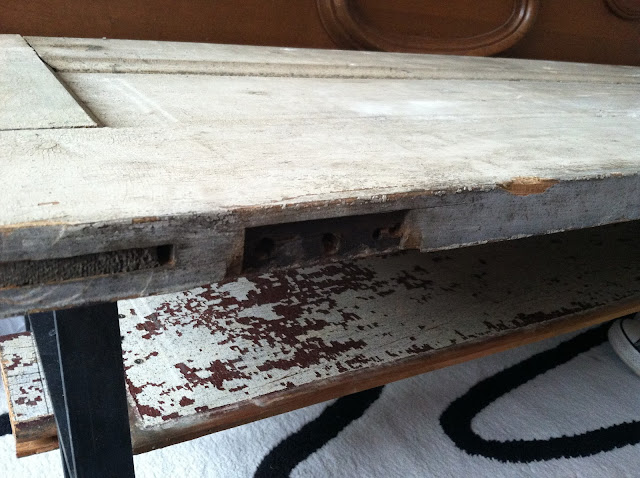
Because the painted part of the door was so flaky and chippy, I decided to use the unpainted side for the bench, but used the painted side up for the shelf underneath. Lots of sanding smoothed out the splintery edges, and polyurethane semi-gloss filled in and softened some of the divots. 

It was a somewhat simple project. The hardest part was figuring out which part of the door would be the bench, and which part would be the shelf underneath. Since it was such an old door it had some pretty good cracks that we wanted to avoid putting any weight on. Then when we decided on the sturdiest parts of the door to use, we had to figure out where to attach the legs, which was much easier said than done. The legs had pre-designed holes for the screws, and since the door is not a completely flat piece of wood, we needed to find the best flat parts on either end where the legs could be tightly attached. 

We played around with a lot of different options, but I am very pleased with the final product. I can assure my client that we didn't compromise on quality or her vision, and that is a great feeling as a furniture re-finisher.

This piece would not have been possible without 2 amazing sources: my Matt, (who has modestly kept his mad woodworking skills from me all these years, but now I'm on to him!), and an awesome Etsy shop called RusticLiving. Their trade is designing and making furniture legs out of steel. I did a lot of research before deciding on this shop and I would love to use them again! Their prices and quality of work are unbeatable. Check them out here!

Thank you to my dear husband, Matt, and my new friends over at RusticLiving!

I think I could get used to this piece in our bedroom... But, it's waiting out a weekend departure in our garage. To find out what happened to the leftovers from the door, check out this post here.

The next Chelsea's Garage sale is set for 
SATURDAY MAY 4! 
Hope to see you there!

Linking up at Blue Egg Brown Nest!

~Chelsea

January 28, 2013

Spring in Winter


Wouldn't you know it - our mystery buds, (found popping up from the garden Christmas morning), bloomed into daffodils last weekend! What a sweet winter treat for inside our home. This was my first time digging up bulbs and bringing them inside. I'm so excited it worked! I sadly suffer from whatever is the opposite of a green thumb. I think 2013 will be a good year.


While our daffodils were working hard to bloom over the weekend, we were working hard in the garage on this old door! Check back in soon to see how we transformed it into an awesome rustic bench! I am so excited to share with you a most amazing source which made it all possible. Love supporting fellow small businesses!!!

Happy Monday and thanks for popping over!

~Chelsea


January 25, 2013

Elegant accent chair

Both soothing and vibrant colors can make a room peaceful and tranquil without too much effort.
Classic Country, by Katheryn M. Ireland

Don't over think color. That's my motto, at least. If something catches your eye or strikes your fancy, there is a reason. We got our home down to a blank slate - neutral walls, furniture, rug, etc, when we first moved in 2+ years ago. Then we felt free to do absolutely whatever we wanted with color! In came the throw pillows, throw blankets, vases, mirrors, rugs, (not all at once, but here and there over the past couple years), and lots of paint :) I've found that I tend to lean more towards bright, fresh snaps of color as the contrast with our neutral blank slate is so peaceful and tranquil to me, just as Katheryn Ireland describes. 

Fresh and vibrant was the plan I had for a particular chair I've had for almost a year:

Last spring I found this lot of 4 chairs on Craigslist, (discontinued from Ikea):

Three were used for custom orders...

...which left one for my imagination :)

The  top color is a mix of 2/3 Antibes Green and 1/3 Florence, (both are by Annie Sloan Chalk Paint). Under that is a soft coat of gray and under that is a bright coat of yellow. Layering colors is one of my favorite ways of aging a piece, especially one so simple as this chair.

Before I even started painting this piece I knew I would be adding nailhead trim. I loved the idea of taking a very ordinary chair and turning it into something one of a kind. It's like a piece of art now and I love that! Accent chairs should be anything but ordinary!


As you can see it is super sturdy :) 


{Will be available at the next Chelsea's Garage sale, date tbd}

Thank you for reading and enjoy your weekend!

~Chelsea


January 23, 2013

An emerald of a table

Last weekend I had the absolute pleasure of hanging out with two of my favorite girls, Sarah and Casey. Casey is my little sister, Sarah is our cousin.

I adore these two :) They are bright, fun, and beautiful inside and out, (as you can clearly see). So, what a time we had when we decided to take an impromptu trip to the thrift store to check things out. Within seconds Sarah found this collapsible table that was ridiculous, (the good kind of ridiculous). The hardware is stunning. The size is just right to make it a versatile table she can use wherever she wants. It has a smooth rolling drawer AND the top flips up to reveal a whole compartment for storing silver, (lined with the softest silvercloth I have ever felt). 

What an honor and delight it was when Sarah asked me to refinish it for her...however I wanted, I might add! I have never seen Sarah's place, so I had no idea what would look right. All I knew was that she loves color and a kind of eclectic layered look. I popped open a new can of paint I got a while ago called Antibes Green by ASCP. She loved it right away and I was excited to try out this new color for the first time! After she sent a picture of a piece of art she has used to inspire her living room decor, I knew this color was perfect. It is bold and bright, yet completely charming - just like Sarah!!

Here is the piece of art she sent me:

What a fun piece to inspire a room, huh?!? And here is the table in all it's green glory:


Now let's see how it looks with Sarah's art piece:
*LOVE*

I will admit, Antibes Green intimidated me when I first popped open the can, (not enough not to buy it, obviously, hah!), but I am pretty smitten with this emerald green color now! It doesn't take away from the elegance of this piece, but definitely adds a little modern sass....just like Sarah! ;)

The low-down:
-Took the table completely apart, removing all hinges and hardware
-Sanded out all the rough parts - every edge was splinter-y, there were chips of wood here and there, and lots of scratch marks that needed 'erasing'
-Brush painted a base coat of Country Grey, also an ASCP color
-Brush painted 2 coats of Antibes Green
-Applied dark wax using a very slightly damp sponge, (my favorite application technique). When you brush on chalk paint, you get these wonderful brush stroke marks! When I apply the dark wax I like to to do so in a circular pattern across the dried brush strokes so you get the dark wax inside the tiny crevices

When you start buffing the wax off the wax remains in the brush mark crevices


-Buffed off excess wax with a lint free rag
-Used a medium grit sanding sponge to smooth out the finish and distress around the edges and corners

Thank you for reading!

~Chelsea


January 20, 2013

Blue; not just for the boys anymore

My most recent piece, hot out of the garage, is this darling blue dresser. It is a custom order for a bedroom of....GIRLS!


Spray painted white hardware adds just the perfect touch of soft sweetness

After making these fabric tassels for Shire's dresser knobs, I am obsessed with using them to adorn girly bedroom pieces. (Fabric tassel tutorial to the right of the page)

So, how about some blue in our little ladies' rooms? :)

The low-down:
-Spray painted a flat white primer
-Painted a thick coat of white
-Rubbed areas where I wanted the white to show through with Vaseline so the blue would rub off easily
-Painted a thick coat of blue, (a custom mixed color)
-Used a dry kitchen sponge to remove the blue off the spots where the Vaseline was rubbed
-Used a medium grit sanding sponge over the entire piece to smooth things out
-Sealed in polyurethane semi-gloss

~Chelsea


January 18, 2013

Crushing on color

So, this past Christmas, among other tools, I asked for paint. I was thrilled to get a little sample size of a color called Florence by Annie Sloan. Florence is a deep, eye catching turquoise; a popping color that cannot be ignored.

Lately, I have had a huge a crush on interiors that are soft, light, and airy in color and feel, but then completely shaken up by a bold, bright color. Whether in a piece of furniture, decorative pillows, or art, I think adding a stand-out color really loosens up a room so it's not so stuffy or serious. After seeing a handful of interiors with this sort of vibe going on I've been inspired to shop for some bolder colors lately! You'll be seeing some colorful pieces coming out of Chelsea's Garage here and there, (even if it's just a peek of boldness under a soft coat of white or gray, so yummy), starting today with Florence!

My Florence 'guinea pig' is a little table that I scored off of Craigslist a couple weeks ago.


I love the legs and the scalloped apron on the front side. This cutie is not too big, but tall enough to be versatile. I could see this working as an end table, night stand, entryway table, or even in a larger bathroom.


Loving how fresh this color is when surrounded by all neutrals!
{Available at the next Chelsea's Garage sale. Date tbd}

The low-down on this sweet little table:
1. It was already painted white when I got it so I just rolled with that as my base color. It wasn't a good paint job, though, so I had to do a lot of sanding to smooth out the rough parts.
2. Brush painted on a single coat of Florence
3. Used a medium sanding sponge to remove lots of the Florence for a heavily distressed and aged look.
4. Sealed in a glossy Polyurethane protective sealer. Annie Sloan sells her own line of clear and dark waxes to seal her chalk paint, but sometimes I like to use something with a bit more shine :)

What do you think? Does your home have a particular color that shakes things up a bit? I've mentioned it before, but I'm particularly drawn to shades of aqua and teal. What catches your eye?

Enjoy your weekend and thank you for reading!

~Chelsea