July 31, 2014

Flea market finds, meet The Boys

By Chelsea


Hi All! The other day I shared an eclectic collection of recent thrift store, flea market and Craigslist finds. Two of them ended up in our boys' room, (along with a couple DIYs coming up tomorrow)!


Actually, ALL of the boys' room is a second hand collection of sorts, like the blue bookshelves, below, which I found at the Lucketts Spring Market a few years ago.


But, if you look close, you can see the two newest additions which both came from the big D.C. Flea a couple weeks ago.

See the Mexican blanket on the floor? We're using it as a rug! These blankets are always thicker than a typical throw blanket and are easily durable enough to handle the heavy use of little boys.


And there's item no. 2: The aviation chart!


This was exactly what I was looking for to stick above the second bed. The sweet woman who sold it to me at the flea market, (she decoupaged the map over a large canvas!), told me that she was hoping it would be taken for some boys. Clearly meant to be. We even found where we live!


Coming up tomorrow are two DIY projects that I whipped up for this room, (but could easily be translated for any room of the home). See you then!

Thank you so much for stopping by!

~Chelsea

July 30, 2014

School House Desk {Available for Sale}

By Cate


I walked into a thrift store last week and almost immediately locked my eyes on this little gem of a desk.  It wasn't hard to miss since it was sitting right by the door plus that fun Kelly green color was practically flirting with me.  When I texted a pic to Chels, her response was "Yay! Kelly green sends my heart soaring."  That settled it: he was coming home with me.  Admittedly this photo really doesn't do the shade justice since it's reading more forest-y green here, but trust me he's a charmer!  What I didn't care for, however, was the original top: that laminate wood I can so easily remember bored classmates carving into in Freshman Geometry.  


Bueller?... Bueller?... Bueller?


The fake wood was flunking the desk's overall vintage vibe so it had to go.  I nixed it in favor of a freshly stained piece of real wood.

It's amazing how such a simple {and affordable} change-out can make all the difference.  I'm giving your update an A+ mister.

Now that old deadbeat top can no longer hold this vintage charmer back. 

And the top even pulls up for more storage!  A++ 

{Doesn't this take you back?  Who here remembers their old elementary school desk?  You know... back when we had lunch boxes and pencil boxes and everything we owned seemed to have our name written on it somewhere?}

There's even a sweet little pencil tray along the front-most inside edge.  A+++

{And I couldn't resist enlisting the help of the faux pull-down chart from my recent guest post.  It was practically begging me to be included in a vintage school house photo shoot.}


I could totally see this guy acing it in a playroom or nailing that extra credit as a quirky side table with hidden storage.

Now available for sale.
24"W x 18"D x 30"H {adjustable}
$75

  Any takers?  Email catherine.henifin@gmail.com if you're interested!

Happy Wednesday,

~Cate

July 29, 2014

CG, here and there

By Chelsea


Hi guys! The last few days have been pretty thrilling for Chelsea's Garage. Two of my personal favorite sites just featured work by CG! (And I know it's not cool to show high levels of excitement and you're supposed to act like you done it before and all, but here's the thing: I'm not cool enough for that. Getting excited is pretty much the core of my being and I get my socks knocked off all the time). So let's proceed.

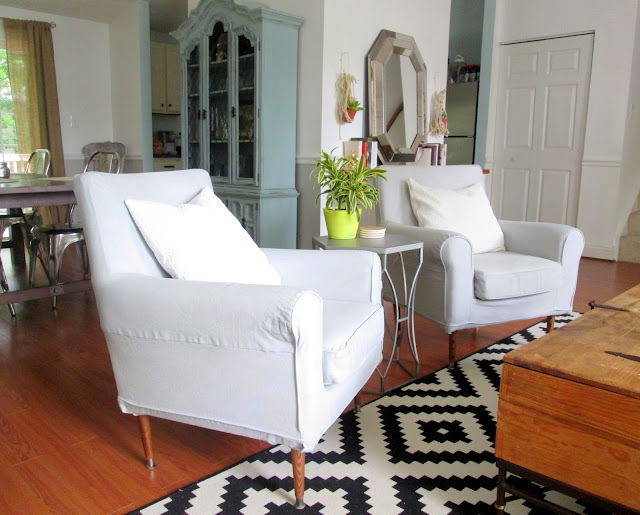
FRIDAY was particularly special because my secret blog-mirer, Mandi, of Vintage Revivals, featured this chair in her weekly Newsletter, (which is a really cool extension of her site featuring a lot of her friend, Jamie's, awesome work). Jamie caught it on Instagram last week and picked it for a feature! Never heard of Vintage Revivals? Please hop over to check it out; then you'll get YOUR socks knocked off! (And while you're there, you should definitely take 10 seconds to sign up for the free weekly newsletters. They're loaded with DIY projects, free printables, and feature creative ideas from people around the world! And guess what? They're featuring another  Chelsea's Garage project in their newsletter this week which I haven't even shown yet here on the blog! So if you want a little sneak peek of that, then definitely get that newsletter! Just head over to Vintage Revivals, and enter your email address under where it says Weekly Newsletter on the left hand side)

Here's the chair they featured last Friday:
Photo: Happy Friday, indeed! Psyched that this piece was featured today in the Vintage Revivals newsletter! If you aren't subscribed to these free weekly newsletters from this ridiculously awesome blog, you should do so. Lots of fun DIY projects, free downloads, and a peek at what other creatives are doing around the world! Thanks to Mandi at VR and her right hand girl, Jamie, for the special nod in this week's edition!


Then on MONDAY, I was so delighted to see that the IKEA Jennylund chair makeover was featured here on IKEA Hackers! I absolutely love IKEA Hackers! Seriously, what's better than a store that sells awesome, affordable stuff, and then an entire site dedicated to making that stuff better and more original?! IKEA Hackers is THE place to find inspiration for all of your IKEA pieces. 

Here are the chairs they featured on Monday, (yesterday):


Thank you so much to Vintage Revivals and IKEA Hackers for the nods! More exciting things are comin' tomorrow when Cate's weekly Wednesday edition is up!

Thank you so much for stopping by!

~Chelsea

July 28, 2014

All things thrifted {Latest finds!}

By Chelsea


Hello dear friends! I hope it was a pleasant weekend for all of you; and to my sweet customer Emily who caught a flight out of Boston at 6:30am on Saturday morning, landed close by in Dulles at 8, picked up a rental car, drove to my house by 8:45, picked up her 4 parlor chairs that she purchased, and started the drive back home to Massachusetts by 9:15...WOW! I was praying for you throughout the day. Hope you made it back safe! (and I REALLY hope those chairs are kickin' butt in your home!!!)

Seriously, does she deserve a shout out or what!?!

Our weekend was a little different from Emily's. Here's a short recap:

Home Depot. Where everybody knows our name. 
(not really, but it's kind of like our Cheers)


Play.


Home Depot again. Where pretty soon they really will know our name.
(the story behind these paint sticks is coming up later this week!)


And happy mail! I got my floral kimono by Kiss Me Mint at the end of last week, (a lovely company whom I had the pleasure of discovering through P.S. I Adore You). Rather than hang this pretty piece in the dark closet I decided to let it do double duty as wall art when not being worn!


And that brings us to today's topic: THRIFTING!

Thrifting has it's ups and downs, and recently I've hit a spell of luck! Through thrift store gems, a successful D.C. Flea market adventure, and Craigslist finds, I've got a handful of items to catch up on here! 

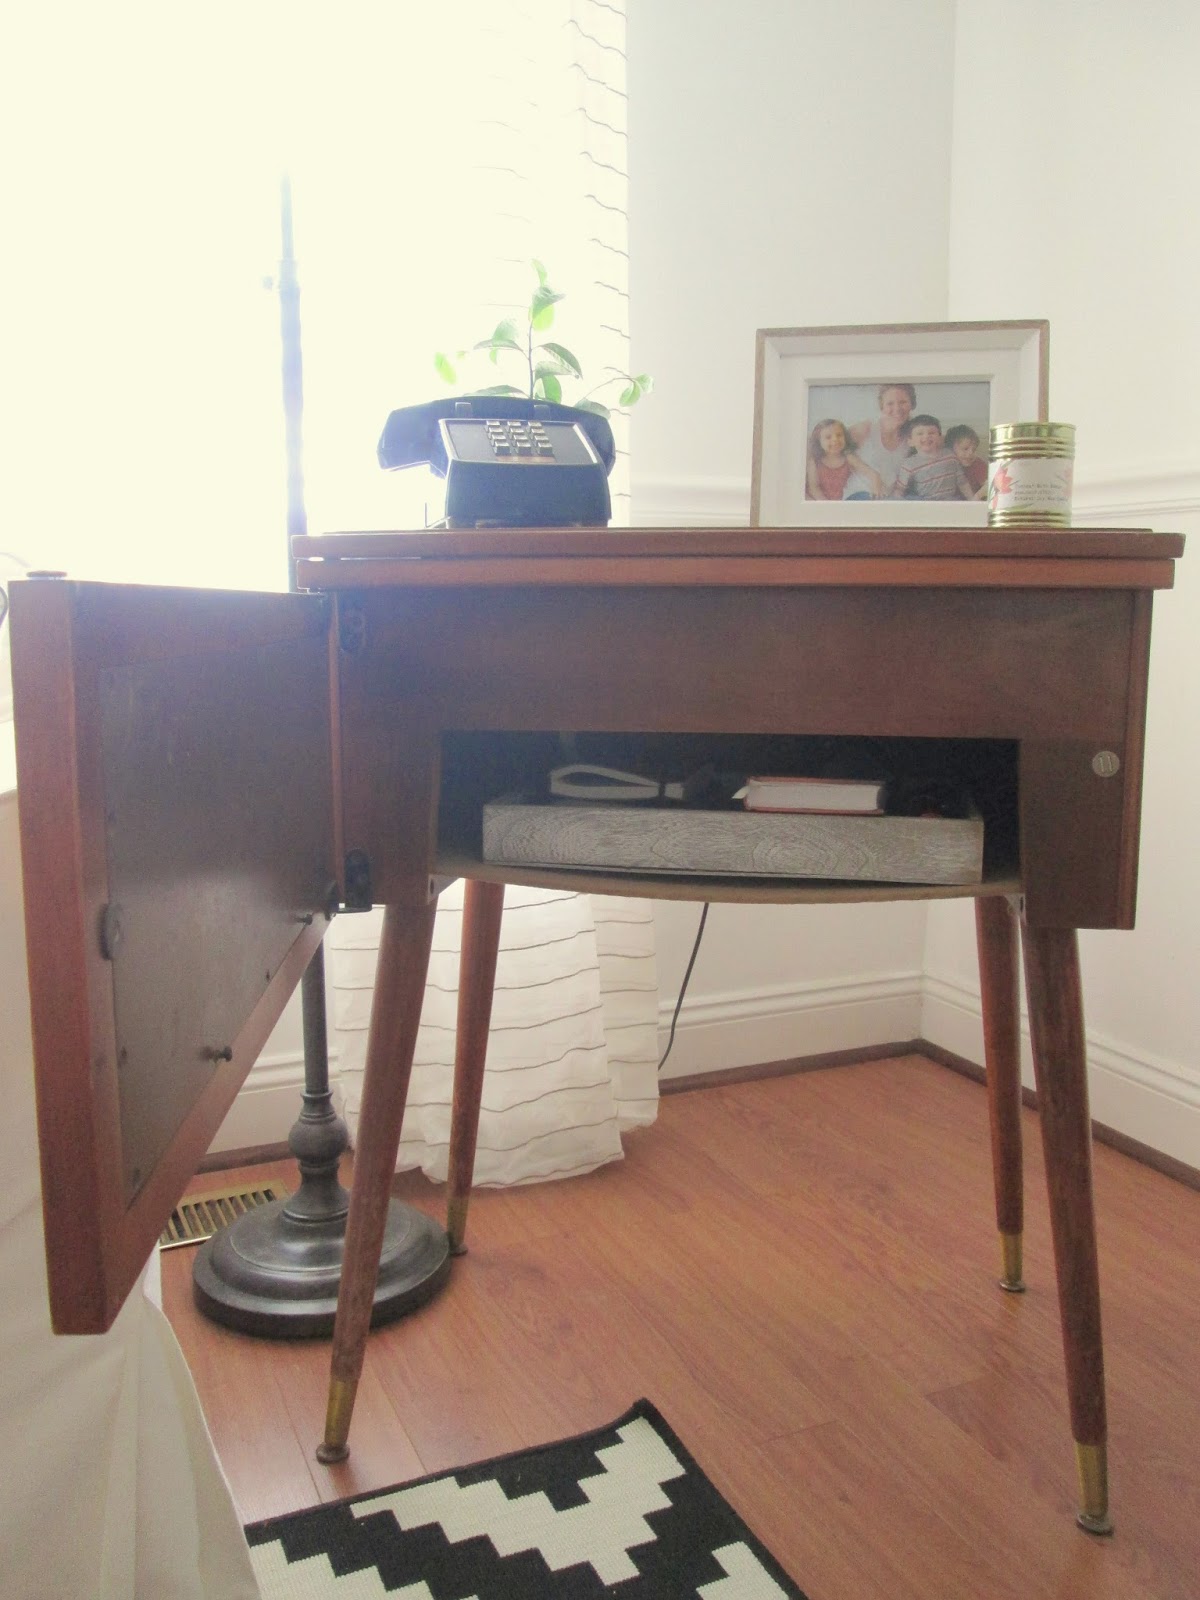
First up, this vintage mid-century modern sewing table. I NEVER thought I'd be the owner of a sewing table. In fact, my eyes light up when I see the words 'No Sew' in a tutorial. But when I saw this table on Craigslist a couple weeks ago for a steal, I loaded the kiddos up and we drove through town to pick it up. 


I'm not familiar with how sewing tables work, so I was overly delighted when I realized that not only does the top flip open, but the front is actually a door! 


Next up, we had a successful trip to the big DC Flea market at the Dulles Expo last weekend! Things got off to a great start:

Shire and I got our game faces on and met our right hand girl, Cate, and my good friend, (and treasure-hunter extraordinaire), Tobi!


Then things got interesting...

Shire pondering if four beautiful eyes are better than two.

Think this is how they took selfies back in the day?
 

Of course! Why wouldn't one make a toilet seat out of a summer's worth of collected seashells?!

And some things are so good to know ahead of time...

My favorite table in the entire flea market. Definitely could have taken a few stacks!


But at the end of the day, I had some pretty good prizes:


I can't wait to share where these have ended up! Stay tuned. :)

And to finish off the stash, this magnificent pair of end tables found for a client for $8 each at the thrift store! Soon to be lacquered white for her lovely living room. Can't wait to share the after!


Any thrifty finds that are rockin' your world at the moment? Please share in either a comment below, on Facebook, or use the hashtag #chelseasgarage and share on Instagram! Thank you so much for stopping by!

~Chelsea


July 24, 2014

There are two sides to every nook {DIY home office reveal}

By Chelsea


Friends, the weekend is so close I can taste it. I think we're gonna make it!!! Today's post is almost like a Golden Corral buffet - packed with a little bit of everything, (but unlike Golden Corral, I hope it doesn't leave you feeling unsettled and making a dash for the closest restroom. If that's the case I'm not sure it's going to work out between us). Last week I shared the awkward/embarrassing/comical evolution of our front entrance, but I've never shared what's on the other side of the wall...

Our front entrance is all, "Cheers, ya'll! Come on in, stay a while!"


And the other side was like, "Welcome to the rest of your lives, you forgotten misfit toys, muahahahahaha!"


But after the brilliant idea to use this space, this is what's rockin' the other side now:


There's a good chance I'm a little bias, but this is way cuter than it was before. And guess what? Between finding things around our home, the thrift store, and making the desk ourselves, the whole thing cost about $15, (and was a piece of cake to create)!

For anyone out there who may be interested in making a little built in desk themselves, here's the quick and easy low-down on this project, (skip down to the bottom if these details don't interest you):

--> Measure and mark how high you want your desk to be. Keep in mind the thickness of the wood you're using for the desk and subtract that to place the brackets at the proper height, (we used scrap pieces of 1x3 wood for our brackets - if you don't have scraps, ask for some at your local hardware store). Then you need to figure out if you've got any studs in the walls that you could use to screw your brackets into. The photo below was the first bracket we attached because there happened to be studs at just the right spots.


--> Use a level to make sure each bracket is...level. (did I really just explain that?) Keep checking because each time you screw one end of a bracket in, you may need to adjust the other a slight bit. 


--> If you don't have studs, you're going to need to use anchors, (see third photo down). These will help keep your screws secure, and therefore your desk in place, (you can decide how important this is to you). SO, the first thing you need to do before you can tap in your anchors, is pre-drill your holes, To help make the anchors easier to find when you place the bracket over them is to just pre-drill your holes right through the bracket, that way you can line everything up when it's time to attach the screws.


Pre-drilled holes are ready for anchors!


(This is an anchor)


Tap the anchor in with a hammer until you get to the first ridge.


Then use a drill to screw it flush with the wall.


--> Then place your bracket over the anchors, lining up your pre-drilled holes with the anchors, and drill a screw right into each anchor. 

--> Once your brackets are in place you can just slide your desk, (we used a pre-cut sheet of birch), right onto the brackets. The sheet of birch was around $9 at Home Depot. We measured the space it would occupy and cut it to fit with a circular saw. We did not screw it onto the brackets or attach it in anyway. It's simply resting on top, but it's a tight fit so we feel confident it's not going anywhere. 

For a cleaner look I painted the brackets and the desk in the same white as our walls, (Ultra Bright White by Behr). Then I sealed the surface of the desk with water-based Polycrylic semi-gloss by Minwax, (always use a water based sealer when sealing anything painted a light color. This will prevent unwanted yellowing).

New built-in office!


I snagged a couple sheets of cork board at Walmart for just a few bucks and spray painted them gold for a touch of glam.


The wire basket was a planter I already had but wasn't using. Now it holds tapes and other crafting do-dads, (the clear plastic insert keeps everything from spilling out).

 
The tiny gold piece was part of a pack of baking tins, (found at Michaels), for baking Lord knows what, (something fancy I assume). They had various shapes and sizes which I've used for making stamped patterns on fabric, lamp shades, tea towels, and cards! I spray painted this one gold and it's perfect for gathering thumbtacks. 

The wishbone is for good luck; luck that I will ever get anything done here. :)


Let's talk about this lamp really quick! It's my favorite thing about this new tiny office. Since there's very little room on the desk for even a small lamp, I wanted to make use of the wall space and hang something. This cutie was waiting just for me at our local Goodwill thrift store. The fixture and shade didn't come together but are a perfect mix n' match - together they cost $5.


I love how it stretches to a centered position on the desk when needed! 


My Mom gave me this card over 5 years ago when I was pregnant with our twins. Just had to share. Isn't it sweet? (And so true?!)


So there you have it! The two sides of our very special nook!


This project belongs in the quickie category. Once the supplies were gathered, this thing was finished in about two and a half hours, (and it will go much quicker if you aren't stopping to take photos of each step). If you have questions about anything don't hesitate to ask in either a comment or email!

Thanks for stopping by!

~Chelsea