
Hello again! It's been quite a week so far, let me tell ya! My 2yr old twins have both been a little 'off'. If you're a parent, you know what I am talking about. Whether you are or not I'll spare you the details because I'd really like you to come visit my blog again! ;) Anyway, I feel like I'm pulling teeth just trying to get them to nap for more than 30 minutes in the afternoon! Perhaps it's the warm sunny weather just calling their name :)
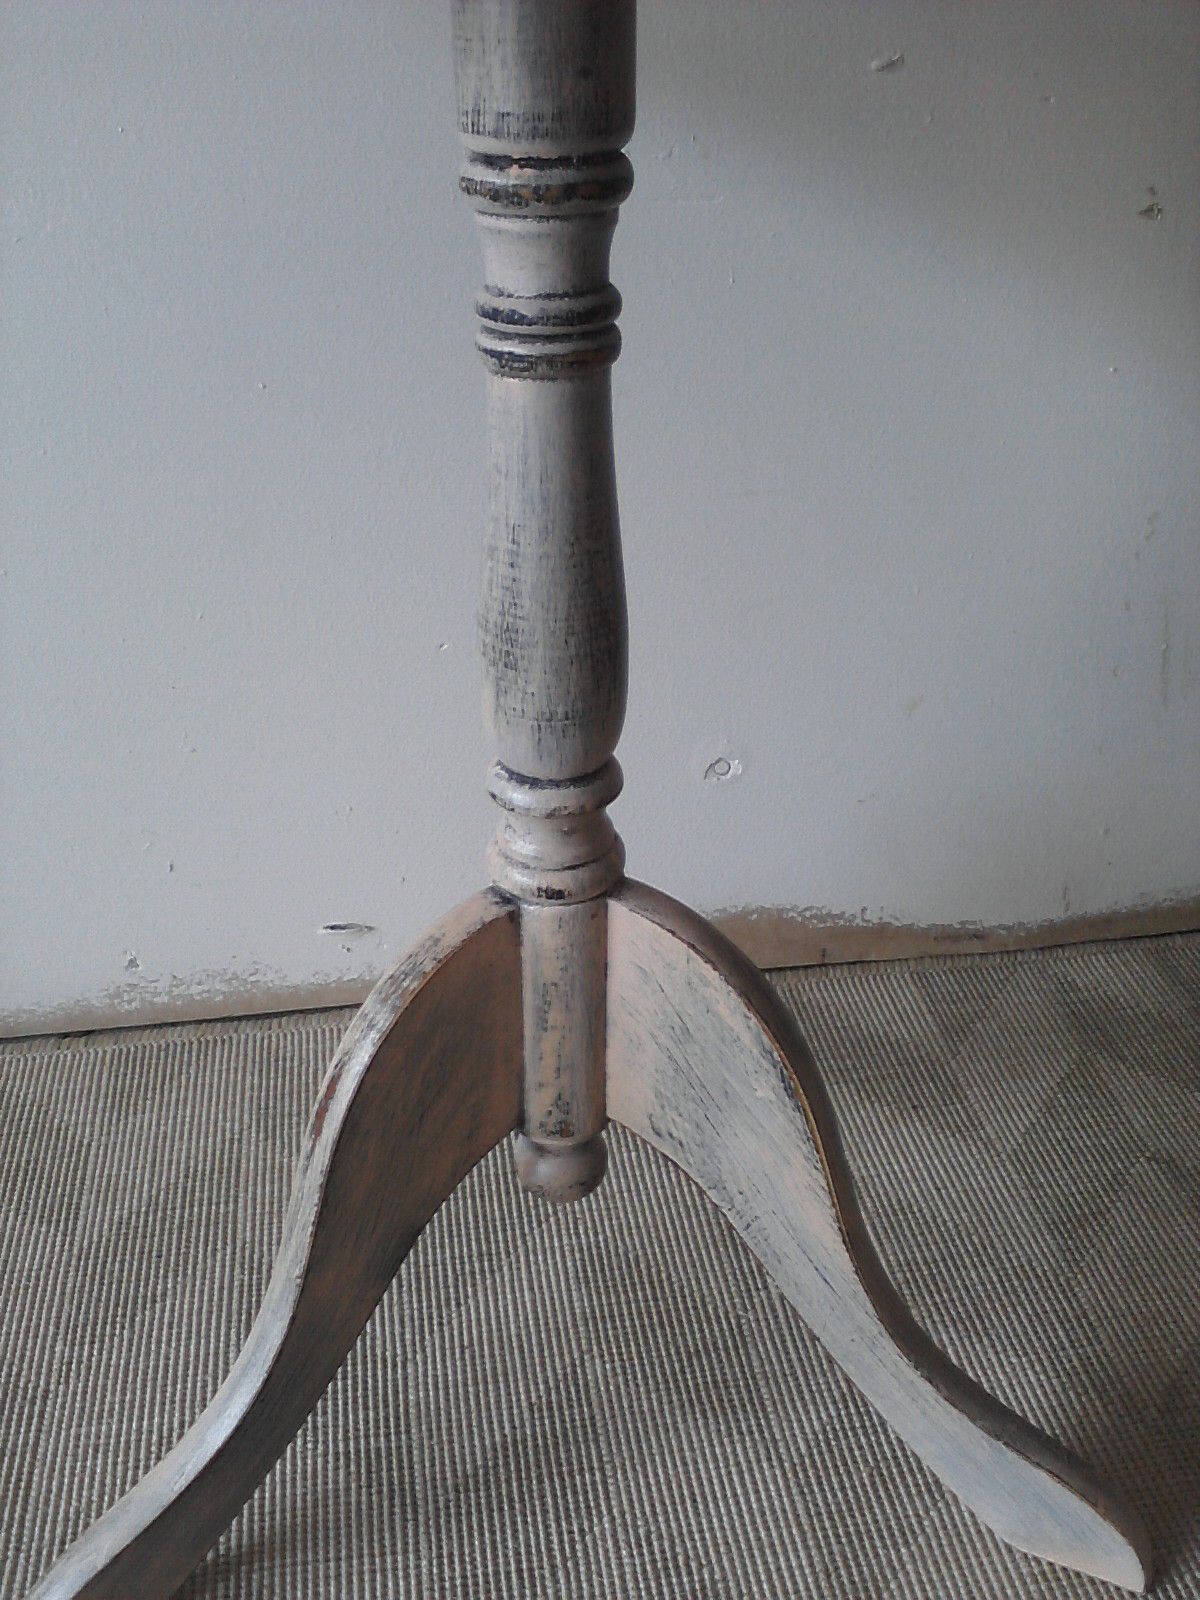
Amidst this 'phase' that we have found ourselves in, I did manage to finish 2 end tables in the past few days. One is new, the other I've had for a while. You may have seen it from photos before. A friend gave this to me to redo, and because of it's size I was a little dumbfounded by what exactly to do with it. First I painted a base coat of white and topped it with gray, then distressed it down to see some of the white and natural wood. This is how it looked for quite a while:


Now onto the other table I was simultaneously working on. This one is newer to the Garage, but I took it back a few decades by adding several layers of color. This little number was given a base coat of black, a layer of soft yellow, and finished in a light peach. Then came the fun of distressing and with this piece I didn't hold back! You can see all the layers of colors which makes this small, soft peach table look like it's seen nine lives. It's small and chippy and perfectly imperfect.


This was sealed in Minwax Polyurethane Semi Clear Gloss for a smooth, shiny finish. Wouldn't it be cute as a bedside table?! Or in a foyer to throw your keys? Or in a bathroom for spare toothpaste and brushes for guests? Or in a reading nook? Oh, I could see this little number in some fun places :)
These pieces will be saved for now as I am in the process of collecting once again for another sale! I'm hoping to have one at the end of June or beginning of July. We have to plan around some upcoming family trips so I am not exactly sure at this point how much stock I will have by mid-end of June and I want to be sure to have plenty! I will definitely let you know when a date is set!
In the mean time, do you have any fun transformations happening in your home? We'd love to hear about em' - you can even post pictures when you leave a comment!
Have a fun day!
~Chelsea
Amidst this 'phase' that we have found ourselves in, I did manage to finish 2 end tables in the past few days. One is new, the other I've had for a while. You may have seen it from photos before. A friend gave this to me to redo, and because of it's size I was a little dumbfounded by what exactly to do with it. First I painted a base coat of white and topped it with gray, then distressed it down to see some of the white and natural wood. This is how it looked for quite a while:

But, it just never felt right to me. It didn't seem done for some reason. So this past week I dusted it off and started working on it again. I added some faded yellow stripes to the top and sanded it down all over, (again). I clear coated it in semi gloss and - Ah-hah! Much better, I think :)

For faded/weathered looking stripes, I painted the yellow on with a dry brush technique, then once it was dry, I used a fine sanding block to remove excess paint, allowing the gray to be seen underneath. I love how these two particular colors play off each other.


Who says you can't have print on your furniture? Every room needs a balance of solids and prints and I absolutely love how stripes go with any other print; floral, paisley, geometric, polkadots....it adds an element of whimsy that I have grown to adore. Stripes definitely call a bit more attention to this table than it previously had. :)

Now onto the other table I was simultaneously working on. This one is newer to the Garage, but I took it back a few decades by adding several layers of color. This little number was given a base coat of black, a layer of soft yellow, and finished in a light peach. Then came the fun of distressing and with this piece I didn't hold back! You can see all the layers of colors which makes this small, soft peach table look like it's seen nine lives. It's small and chippy and perfectly imperfect.


I decided to keep the original hardware because when I removed it I realized it was tarnished and blackened on the back, so I decided to put it back on backwards, showing the blackish edge.

These pieces will be saved for now as I am in the process of collecting once again for another sale! I'm hoping to have one at the end of June or beginning of July. We have to plan around some upcoming family trips so I am not exactly sure at this point how much stock I will have by mid-end of June and I want to be sure to have plenty! I will definitely let you know when a date is set!
In the mean time, do you have any fun transformations happening in your home? We'd love to hear about em' - you can even post pictures when you leave a comment!
Have a fun day!
~Chelsea
I LOVE the 'chippiness' in the second piece and the stripes and colors in the first! I'll post pics of the nursery I'll be working on over the summer :)
ReplyDelete-Kat
Oh yay!! Little boy rooms are so much fun to create and I can't wait to see what you do!!!
ReplyDelete