August 31, 2012

3 colors, 1 can of paint

Happy Friday, everyone! Before I show you some goodies, I just gotta share something.

Raising kids is hard.

Man, is it hard! To update those who do not know me personally, we now have two almost 3 year olds, (boy girl twins), and a 17mo old son who I fear has no fear. The twins have become so emotional lately! I've heard this is normal for the age of 3. But, I really wasn't prepared. I tend to think of myself as a fairly sensitive person who's emotions can change on a whim....so I can totally empathize with my kids, I'm just not sure quite how to handle it! Then there's 17mo old, Mason. Lord, be my strength. He is as innocent and mischievous as they come, if you can imagine the two coinciding in one little person. Mason has not shown any signs of fear yet, (unless you count this morning when I screamed after a HUGE bee I had hit with the fly swatter got back up and flew after me...Mason, startled by my shriek, cried for his life). This past week has reminded me how little my own strength is, and how much the Lord has to give.

In my short time as a momma so far, one of the biggest things I have learned about raising little ones is that every rough patch we hit, the Lord uses it to teach me one more thing about Himself and my kids. And then we come out of those rough times on the other side with a deeper understanding of His love and grace for us...because we are extending love and grace to our children. Not as much as we would like because we are so ridiculously far from perfect. But, we're learning. We will always be learning. Every next stage of our kids' lives is going to be a learning process for us. And learning can be painful sometimes! But, the Lord has been faithful in His promise to take our worries, concerns, weaknesses and troubles upon Himself and replace them with rest. When I worry about how we are doing with raising our kids, I remember that they are a gift from the Lord and He will work in their lives despite our imperfections as parents. So thankful for this gift of peace.
"Come to me, all you who are weary and burdened, and I will give you rest. Take my yoke upon you and learn from me, for I am gentle and humble in heart, and you will find rest for your souls. For my yoke is easy and my burden is light." Matthew 11:28-30
Colin
Shire
 Mason


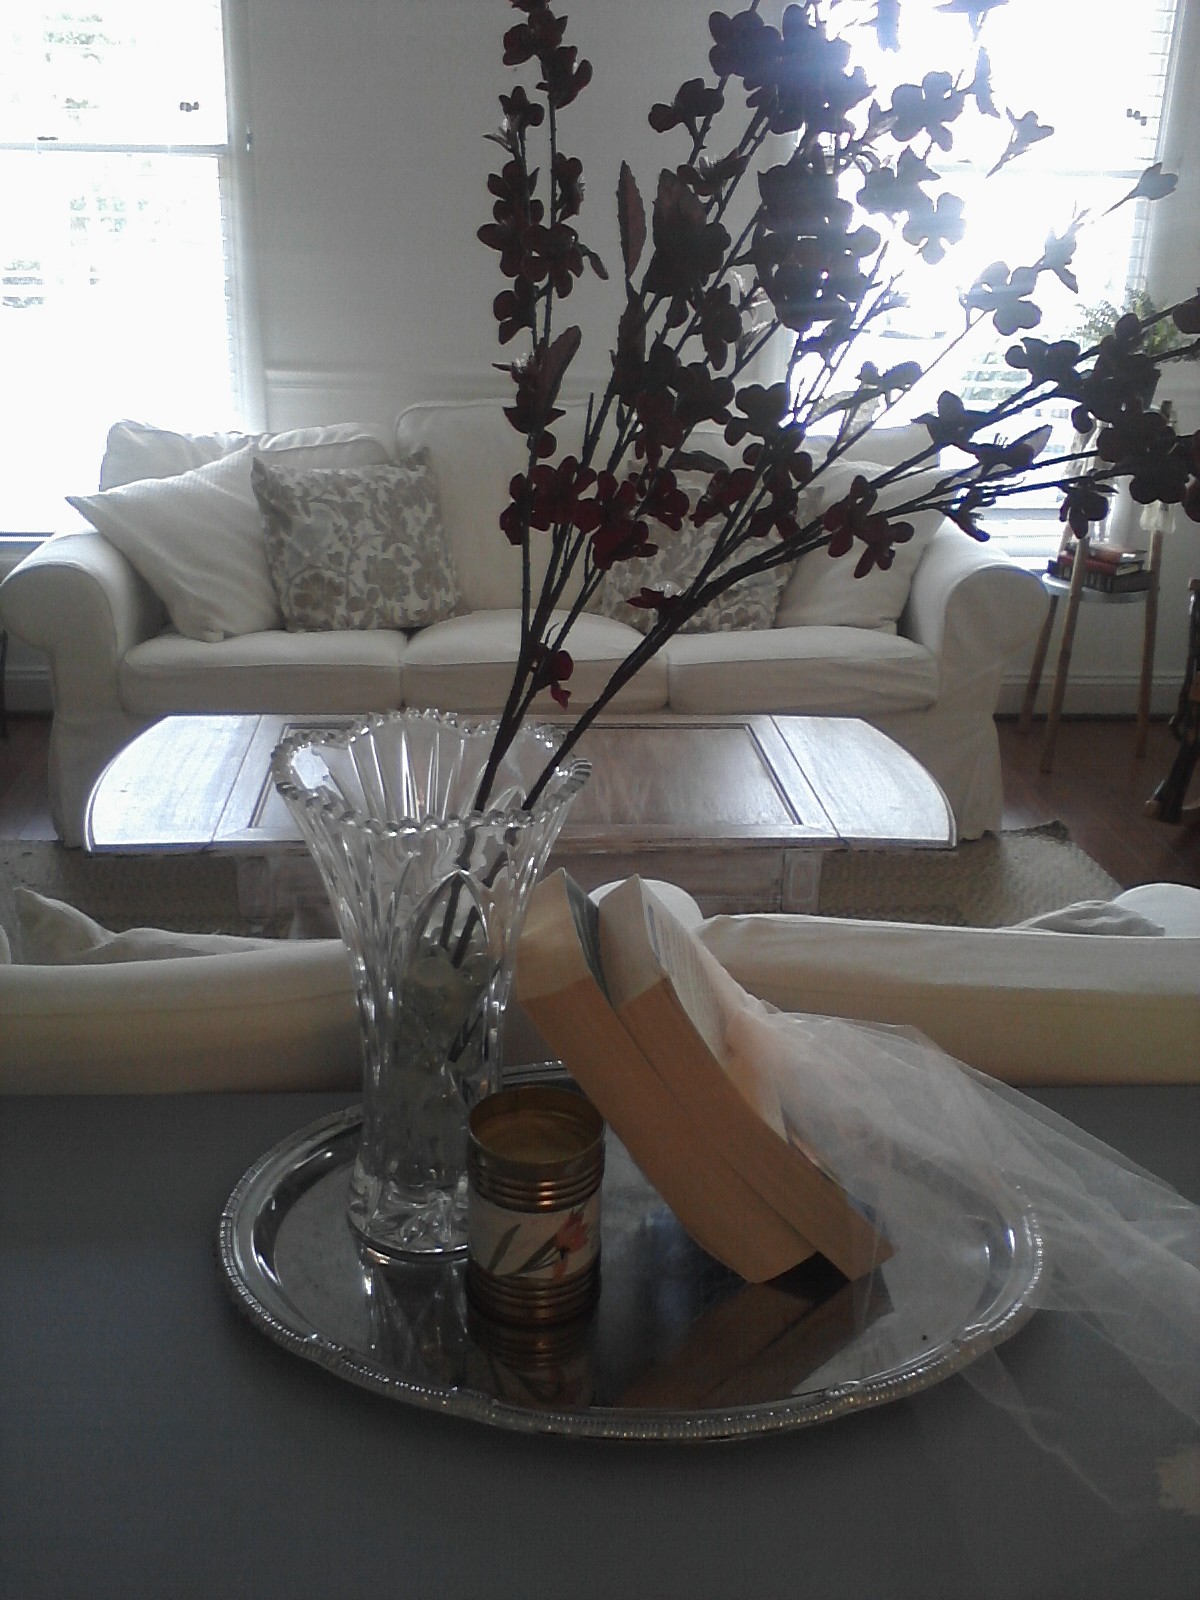
And thankful for a husband who doesn't question the reasons behind why I'm having a rough day, but embraces me and brings home these:
 
Aren't they pretty? :)

Now onto the goodies! If you've been following this week you've seen the night stand table and dresser that were done in the same color, different shades. Well, I did one more project in that color but used it as it is; no mixing with anything else.
Frames!

It's such a saturated, glossy, teal blue that I thought some frames would be a fun way to show off this fantastic color.

And here are this weeks pieces, all done from the same can of paint, displayed together!


It's so fantastic the range of color you can get from one can! A great way to really get your money's worth and have multiple pieces that 'go' but aren't completely the same.
 
Thank you for reading! Next week I have a client with a very modern vision dropping off an ollllld antique buffet. Ooooh, how exciting! I can't wait to show you the before and after!
 
~Chelsea
 

August 30, 2012

It's that time again!

As the hot days of summer are now numbered I am starting to collect pieces once again for a Chelsea's Garage on-site sale! If you check out my Etsy shop don't expect to find much in there as I will be holding onto newly refinished pieces for an upcoming autumn sale right out of our garage. If you haven't been able to attend or see photos of past sales, it is such a fun day!


Transforming the garage, (with bikes, kids toys, lawn equipment and all), into a warm and inviting little showroom for a day is how this all began. In the past few months my focus has turned more from hunting for my own pieces to taking on client orders. While I absolutely LOVE working with clients and giving their vision for a piece it's own reality, I also still enjoy the thrill of finding interesting pieces and dreaming about what they could be...and working it out!

It's also a fun opportunity to test out different techniques since I don't have to worry about upsetting a client if it goes horribly wrong! In my previous post I had success using Vaseline as a distressing tool. I tried it again on a GORGEOUS dresser yesterday and I must say, I'm a big fan!
 {will be available at the next Chelsea's Garage sale}


For me, a piece is not truly finished until it is in my home, staged, and photographed. That's just the icing on the cake for me...buttercream icing. The best kind.
 
Tying these two fantastic reads by my one of my favorite authors, (Jodi Piccoult), in tulle seemed to tie in the Marie Antoinette look that this dresser seemed to have when I stepped back from the finished product. I'm not educated in Marie Antoinette's style, but am I right? From the tone of the blue to the two round pulls and the curves of the upper drawers - when I finished this piece I just had to google Marie Antoinette and check if my first impression was accurate.
It wasn't too far off. But, I'm no expert.:)
 
This piece was done in a lighter shade from the table that I posted on previously. Come back tomorrow to see an entirely different shade of the same blue! We're going ombre this week! Sorta.:)
 
~Chelsea


August 28, 2012

Distressing while moisturizing - what a deal!

I would like to introduce to you my new little friend, Vaseline. Yes, Vaseline. We actually go way, way back. As an unfortunate victim of very sensitive skin, I've been using the ointment since I was young for chapped lips, cracked knuckles...you get the point. As a Momma I've used it to rescue many a rashy little hiney. But, I never thought the oily substance would be one of my regular tools for refinishing furniture!

 
But, it's the truth. I've learned an awesomely fun new distressing technique and I couldn't wait to share it with you: Just rub Vaseline, (use your fingers, a brush, rag, whatever), over spots where you want to easily remove your top coat of paint. I like to focus on edges and corners in particular, and sometimes an unexpected spot or two along a side and on the top. Then paint over the piece like normal. Once your paint is dry, take a medium grit sanding block and rub over the entire piece. The paint will rub off quite easily in the spots where the Vaseline is.
 
 
I especially like this technique when I want to layer two colors. It makes it easier to distress letting the bottom color show through without worrying about rubbing through the bottom color to the wood. Does that make sense? I paint the base color on first, then rub the Vaseline on over a few spots, then paint on the second color. When I go back over with the sanding block I can reveal a few peeks of the base color without going all the way through to the wood.
 
 
 For this piece I made drawer pulls from strips of linen,
which I knotted on both sides of the screw holes.
 
{will be available at the next Chelsea's Garage sale}
 
This week I am trying out 3 different shades of one color. Hoping to have all 3 photographed for a fun 3 in 1 post on Friday.:) (This table is one of the shades!)
 
Thanks for stopping by!
 
~Chelsea


August 26, 2012

Shutters?....Chic?!

Hi, hello, howdy :)

About a month ago I scored 8 old white shutters, great condition, just need to be cleaned. I think they were $5 for the bunch.
 
I excitedly scooped them up because they looked interesting and were so cheap...but then I got them in the garage and propped them up in a corner...and there they've stayed collecting dust ever since. Partly, they just haven't been a top priority to do anything with since I've had clients, (patiently), waiting for their pieces to be done. But, even if I had all the time in the world I think they'd still be sitting there. Why??? Because while I like the look of shutters as decor, I just don't know if my style is quite in 'that' direction. There's something about accessorising with shutters that seems to be too much of a step towards country cupboard for me. However, I like rustic - but I also like sophisticated, (which is funny since my home is outnumbered in toddlers to adults). So, I've done a little research to find some ideas for shutters that are clean and chic. We've all seen pictures of shutters being used as headboards, or as a place to collect photos and note cards, or attached with hooks to hang things from, or even anchored with legs and made into coffee tables. I can't imagine trying to set my glass of wine down on a shutter tabletop....(if you have one of these shutter tables, I hope I'm not offending you! Just being honest....). While all these ideas are very creative and lovely, they just aren't me. Without further adieu, here are some ideas for shutters I would definitely consider for my own home:
 
Simple and stunning propped up or hung against an empty wall in an elegant dining room. The contrast of the rustic shutters to the grand dazzling chandeliers is perfection.

NOT a headboard, but rather anchoring a bed and attached with sconces. These are reclaimed doors instead of shutters, but large shutters would do the trick.
Let's not forget about keeping it simple. Propping a single smaller shutter up against a wall on an end table can satisfy the aesthetic need for some height without sacrificing your walls with holes. Great if you're renting with restrictions on hanging things...or unsure about how to complete an empty spot!
I love me some pop art! This is just super cool. I'd put this above a sofa, buffet, bed, in a hallway...easy, fun, and a great punch of color.
Heavenly. This room divide is such a simple idea, but has so much impact visually. It anchors both rooms in a soft and romantic kind of way. This would be my first project if I lived in an open studio apartment. Great idea, too, for open floor plan homes. Create an entrance 'hall' if your front door opens up to a large room. Separate a living room from a dining room. Create two guest's bedrooms out of one with a shutter divide between twin beds, (oh la la, risque!)

 And if none of these ideas appeal to you, there's always this:
 
After searching image after image of ideas for shutters, I think I've found one to try. Stay tuned for how I use my stash!
 
Have any other ideas for shutters? Please share, I'd love to know!!
 
~Chelsea
 

August 24, 2012

Smokin hot knees


Hello there! After a few hours of finishing today's featured project, my knees were covered in this gotta have color.


What do you get when you take 3 mismatched pairs of wooden chairs and paint them all this smokin hot color?

A totally unique, one of a kind dining seating set!
 
I had the absolute pleasure of working with a wonderfully creative client who picked out the chairs and the color and left the rest in my hands. Can you believe that 2 of these chairs were minty green, 2 were white and the other two were a reddish wood, (it's no secret on here that I am horrible with knowing my wood types)? After hours of stripping, staining, sanding, painting, distressing, waxing and buffing....they are a unified collection.

 
I can't wait to see what fabric this gal picks out for her seat cushions!


Umm, I kind of love this! It was fun to try this seating set on around our table and see how it comes together. Maybe a future project?

I've had a lot of requests lately for dining benches. I've done a few so far and really like that idea, too! Any thoughts or opinions out there on dining benches? Please share!

~Chelsea

August 23, 2012

Dreaming a room

The time has almost arrived! The opportunity I have been waiting for, longing for, preparing for. The thing I have so badly wanted to do since we found out we were pregnant the first time around over 3 years ago. Creating a girls room.:)

When we found out we were pregnant with boy-girl twins, I happily went to work collecting items to put together a neutral nursery that was bright and fun and full of joy! I LOVED the twins' first nursery in our apartment.

When we moved I changed things up and made their room into a Dr. Seuss land. It is so much fun - they love pointing to the characters and they know (most of) them by name!

Then when we found out Mason would be a boy it was an exciting challenge for me to create a boy nursery. Knowing we would someday move the boys in together, I didn't want to spend a lot of money or time on a particular theme. I chose some colors I liked, (actually, Colin had a pair of striped pajamas that I really liked - navy blue and gray stripes with orange 'trim' on the ankles and sleeves - his pjs inspired the colors of his brother's nursery lol). Mason's nursery is one of my favorite rooms in our home....probably because of the fond memories I have in there. Oh, the hours spent, rocking, nursing, singing, swaying...my heart is filled with joy just thinking about it.:)

But, we're nearing the time to let the boys be boys and give our daughter a little space of her own. I started collecting little items for Shire's room when she, (and Colin), was merely months old. I knew that someday the twins would probably have their own rooms and I started dreaming.
Our Shire is no princess.... 

The princess pinks and purples are not for her. She is the most imaginative, creative, active, whimsical and kind little girl I know and as I've gotten to know her better it's become more clear how I'd like to decorate her room. Layers of color, patterns and fabrics, space to be creative, and room to grow have all been strong influences behind the pieces that I've collected. Here are some rooms that have caught my eye as spaces that have an idea or two that I've been dreaming of for Shire's room:
 
My daughter, with the wild imagination, may she forever be a dreamer

 
Layering small mismatched rugs, wallpaper on one wall, hits of color high on the ceiling... so whimsical and so much going on. Not for everyone but very much my Shire.
 Source via Apartment Therapy
 
S-H-E. Love this.:)
 
Beautiful headboard idea and I've got several windows hanging out in the garage...hmm.
 Source unknown - if you know please comment so I can credit where due

Yup, love it all, (except for maybe the old dolls on the dresser and hanging from the cupboard door...I just realized I think old dolls are creepy)
 
Well, the wheels are spinning and I've got some fun ideas to work on before the big move. And don't think I've discounted my little men! I may have most of Shire's room collected and ready to set up, but the picture in my head of what the boys room could be is pure awesome, (and mostly free my sweet husband who I'm hoping is learning that my big ideas usually amount to nearly nothing out of pocket!)
 
Have you recently put together a nursery or big kid's room? Leave a comment and tag some pics! I love seeing children's rooms!!
 
~Chelsea