
By Chelsea
First of all, I am totally not exaggerating when I say you guys made my day yesterday. Your response to The Announcement has been heartwarming. All of the enthusiastic words of encouragement just make this next step all the more exciting and Cate and I feel so blessed to be surrounded by such kindness and support. We cannot wait to get Style Mutt up and running for you!
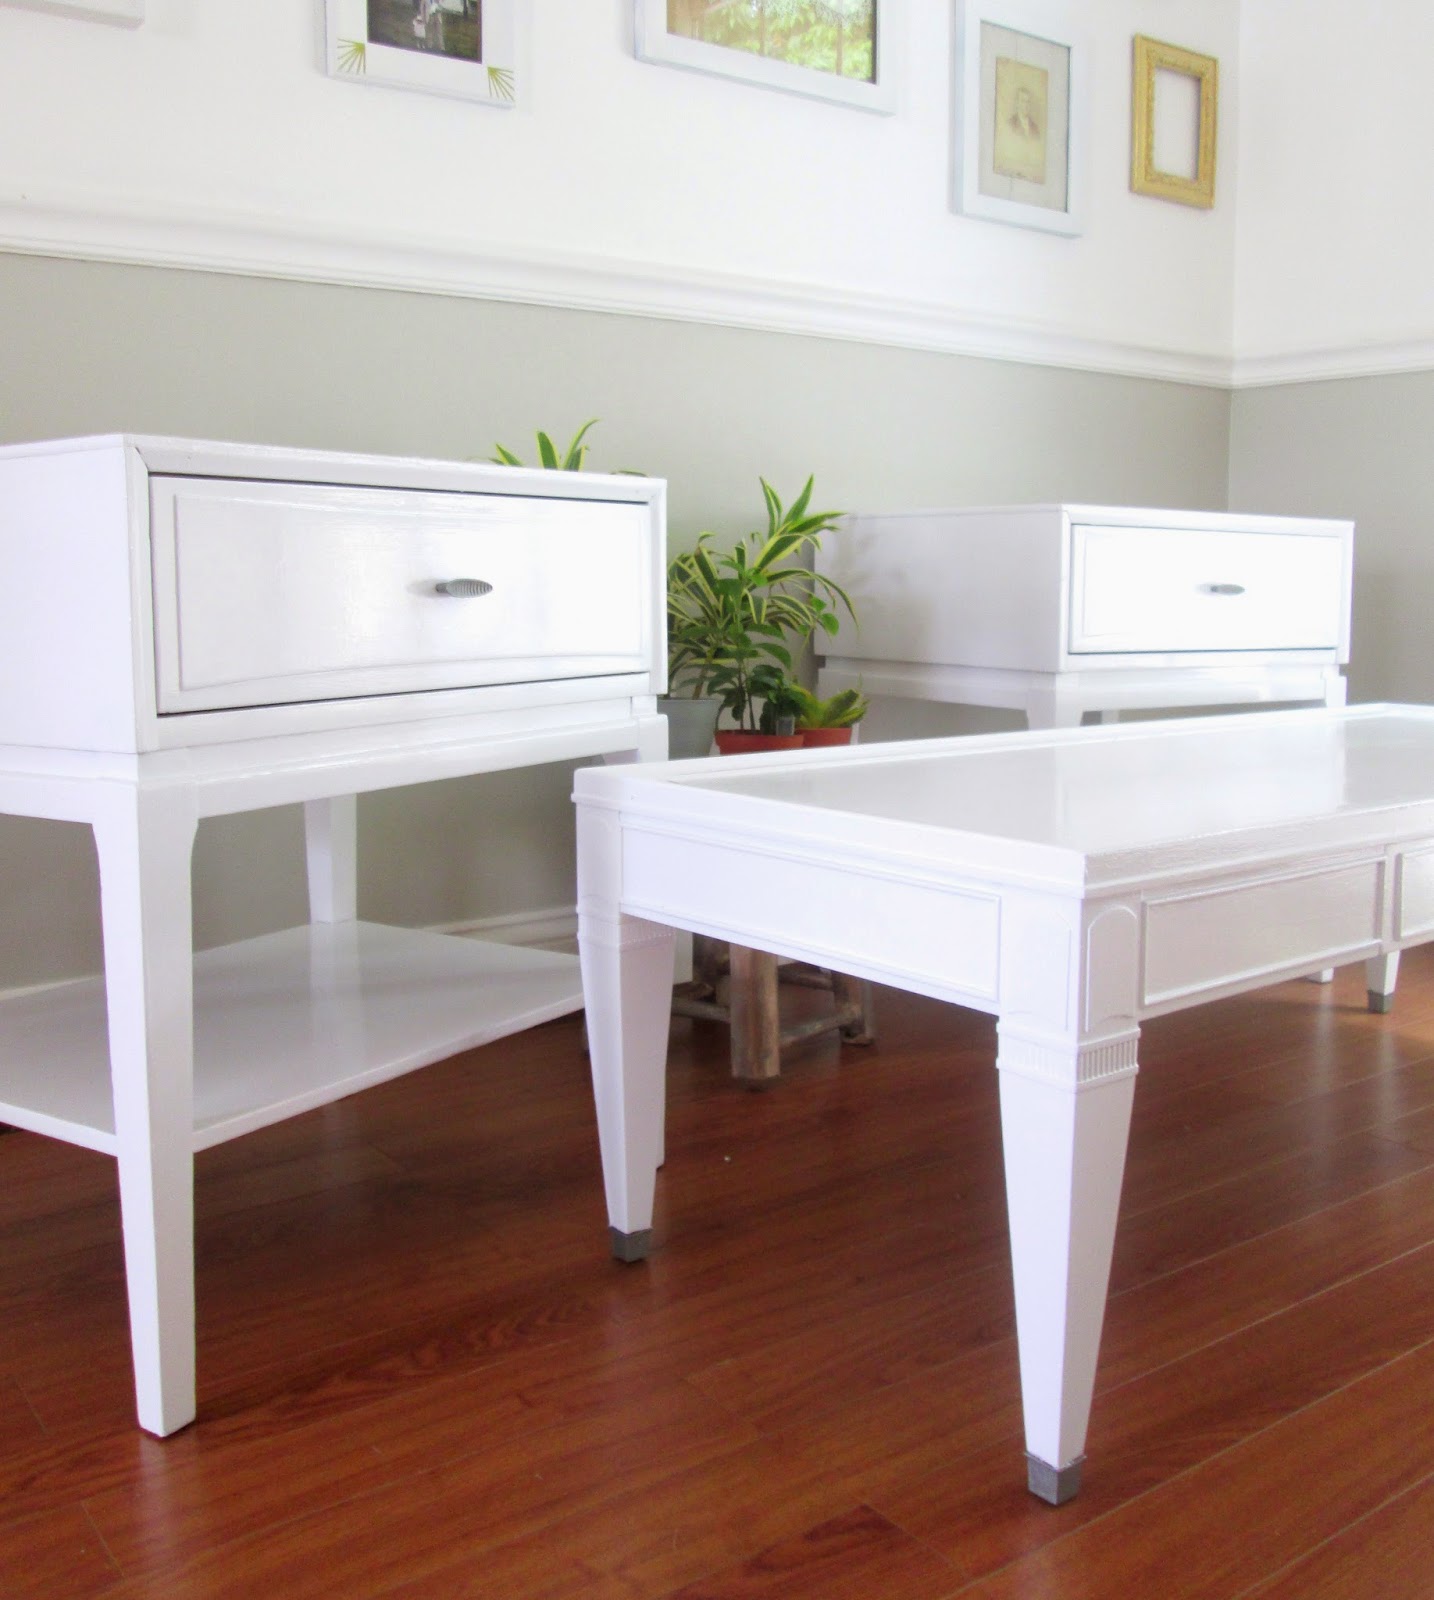
Whew! Now onto some other business. How long has it been since I've painted something glossy?!? I can't even remember. With distressed, weathered furniture in high demand right now, I don't get a lot of custom orders for glossy these days. So when a seriously fun client told me she was thinking of doing a lacquered white set for her living room, my heart did a cartwheel! With her ideal dimensions, a photo of her living room, and general idea of what she was looking for, I finally collected three pieces that I thought would do her vision justice.


Seriously stunning, right?! And the smooth, shiny finish is just amazing. I mean, you could ice skate on the surfaces, that's how glassy they are. So, want to know the secret to painting a super shiny, glassy finish?


First of all, I am totally not exaggerating when I say you guys made my day yesterday. Your response to The Announcement has been heartwarming. All of the enthusiastic words of encouragement just make this next step all the more exciting and Cate and I feel so blessed to be surrounded by such kindness and support. We cannot wait to get Style Mutt up and running for you!
Whew! Now onto some other business. How long has it been since I've painted something glossy?!? I can't even remember. With distressed, weathered furniture in high demand right now, I don't get a lot of custom orders for glossy these days. So when a seriously fun client told me she was thinking of doing a lacquered white set for her living room, my heart did a cartwheel! With her ideal dimensions, a photo of her living room, and general idea of what she was looking for, I finally collected three pieces that I thought would do her vision justice.
(Yea, can anyone in the Northern Virginia area recommend a driveway repaving company? We'll be in the market someday whenever we're ready to sell. Oh my...)
Sorry, I should have taken the picture before I cracked open the can. But it's this Glidden Trim, Door and Furniture paint! It's not with the rest of the paints at Home Depot - it was actually on the spray paint wall of all places. But this product is not joking around. It's thick as molasses, but as you're brushing it on, you'll start seeing the brush strokes settle into the smoothest surface you could imagine. And because it's so stinkin' thick, this stuff is tough as nails once it's dry. I actually, (totally by accident), bumped it a couple times when moving it around, and it didn't get a single scuff or scratch. Plus it wipes really easily making cleaning it off a cinch. The only issue I ran into is that it kind of ruined the two brushes I was using. It's literally like painting with a molasses-like glue. I've never had issues cleaning any brushes before, but this paint would. not. come. off. Even after an overnight soak in Dawn dish soap. And it's still all over my hands after several days and good hard scrubs. BUT, the look on furniture is such a dream it's worth a brush sacrifice, (or two).
The second product, which I used to refresh the mismatched hardware, (which I had already removed when I took the BEFORE picture), is Rust-oleum Metallic Antique Nickel spray. I've mentioned this before, but Rust-oleum is the only spray paint I'll use. For some reason I get serious sputter issues and cloggy nozzles with other spray paints. Call it operator error, but I never have any trouble with Rust-Oleum, (which makes me feel like a big-time pro).
A completely different feel from the lovely time-worn, aged and distressed pieces, but so very stunning and absolutely perfect for this set.
One of the elements of Style Mutt that Cate and I are looking forward to is having a favorite supplies and products page! I love talking products with you guys and enjoy sharing my recommendations when you contact me, but we want to make it even easier for you to find our go-to list of tools, supplies and products for all our DIYs, both big and small. We hope this guide makes it even easier to tackle your own projects at home!
Speaking of home projects, anyone working on anything this weekend? Tag #chelseasgarage on Instagram or share on Facebook! We'd love to see what you're up to!
Thanks for stopping by and enjoy your weekend!
~Chelsea
This comment has been removed by the author.
ReplyDeleteThis looks great! I recently picked up a campaign bedroom set and have been itching to refinish it with a high gloss finish. I will definitely be trying this paint!
ReplyDeleteDid the pieces require any sanding or prep work before you painted them? Also, did you use any sort of poly top coat to seal the paint? I appreciate any insight... keep up the great work!
Hi Julie -- Thanks! Yes, I did sand all three pieces with my electric sander and 120 grit sandpaper. At least focus on getting those corners and edges since that's where most of the wear and tear happens on a piece - you want the paint to adhere extra well to those areas. I also pre-sealed the pieces using Minwax Water-Based Polycrylic spray to prevent any bleed through, which often happens when working with real wood furniture. I haven't done this yet as I've lent out my can of brush-on sealer for the week, but I do plan to seal all three pieces in Minwax Water-Based Polycrylic sealer, which I have in semi-gloss. Honestly, I don't even think the sealing is necessary over this particular paint - it's extremely durable and easy to clean. However, since this is a client set I'd rather seal and be on the extra safe side. I hope that information helps! Best of luck with your campaign set - We would LOVE to see it when you're finished!
DeleteGreat, thanks so much for all your help! I will be sure to send you a before/after pic once its complete.
DeleteGood luck on your future endeavors and the new business... so exciting!
You are so kind! Thank you for such sweet encouragement! Can't wait to see your set; feel free to contact me with any more questions you may encounter as you go.
DeleteI think the reason it wouldn't come out is because it was oil-based and unless you're using mineral spirits, the paint isn't going anywhere. Very pretty though!
ReplyDeleteThank you! The lost brushes, may they rest in peace, were well worth such a high quality refinish. Next time I'll have to give mineral spirits a try!
Delete