
*Shire's room has had a big transformation. You can find updated photos in the Tour Our Home link!
Hi all! Busy day and weekend ahead - Colin and Shire are turning 3 in a few days and we want to make their big day as special as possible! Before I head out for the day I just thought I would drop in really quick to give you the low down on the windowed headboard I made for Shire's room!

First, these old windows are a dime a dozen! You can find them at pretty much any antique store for a few bucks. Also look on the side of the road :) I often see them by peoples trash cans! This one, in particular, was perfect for this project because of it's dimensions. I have several other windows in the garage, but none that are rectangular, (though square would do just fine, too).
I have tons of scrap fabric in my home from all kinds of things. I played around with some different fabrics behind the glass and decided to just stick to fabric that I was using elsewhere in her room, to kind of tie them all together. Once I decided on my fabrics and where each one would go behind the glass, I just layed them out, one at a time, over each individual pane, and staple-gunned them along the wooden edges. After I stapled one fabric on, I would trim the edges close to the staples, and then do the next fabric. I didn't bother trying to cut the fabric to size before doing the stapling, especially because I knew I would be doing a lot of pulling to get the fabric tight.


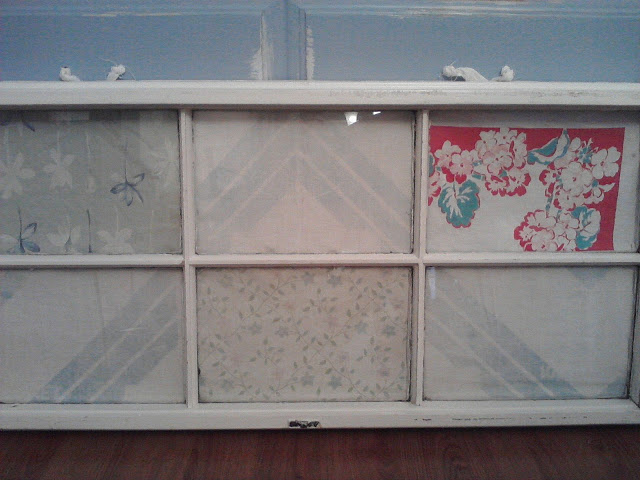
I picked up a couple large size sawtooth hooks, nailed them along the back top edge of the window, and hung the finished product a few inches above the bed - with Matt's help...he likes any opportunity to used his handy stud finder and laser level ;)

Hi all! Busy day and weekend ahead - Colin and Shire are turning 3 in a few days and we want to make their big day as special as possible! Before I head out for the day I just thought I would drop in really quick to give you the low down on the windowed headboard I made for Shire's room!

First, these old windows are a dime a dozen! You can find them at pretty much any antique store for a few bucks. Also look on the side of the road :) I often see them by peoples trash cans! This one, in particular, was perfect for this project because of it's dimensions. I have several other windows in the garage, but none that are rectangular, (though square would do just fine, too).
I have tons of scrap fabric in my home from all kinds of things. I played around with some different fabrics behind the glass and decided to just stick to fabric that I was using elsewhere in her room, to kind of tie them all together. Once I decided on my fabrics and where each one would go behind the glass, I just layed them out, one at a time, over each individual pane, and staple-gunned them along the wooden edges. After I stapled one fabric on, I would trim the edges close to the staples, and then do the next fabric. I didn't bother trying to cut the fabric to size before doing the stapling, especially because I knew I would be doing a lot of pulling to get the fabric tight.


I picked up a couple large size sawtooth hooks, nailed them along the back top edge of the window, and hung the finished product a few inches above the bed - with Matt's help...he likes any opportunity to used his handy stud finder and laser level ;)

For more fabric fun, check out these awesome tables,
and take a look at Shire's dresser knobs here!
Linking up at
~Chelsea
Chelsea!! This is beyond adorable. I love how you lined that fabric up! It makes such a fun and happy headboard. Thank you so much for linking up today and joining in!!
ReplyDeleteXoxo holly
Thanks, Holly! Love checking your blog for lots of inspiring ideas :) Thanks for hosting the link party!
DeleteThis is adorable! I love it. I have a few old windows hanging around, but had never thought to put fabric behind the glass....very smart.
ReplyDeleteHow sweet, thank you!
ReplyDelete