Hi all! Today I've got a couple short-ish tutorials for you on replacing or updating light fixtures. Lighting is one of the most powerful design tools out there, perhaps equal to or greater than paint! All I am gonna say to prove my point is there is a good reason why I'm in such a cranky mood while grocery shopping in Walmart, (hey, I have 3 toddlers and it's a one-stop trip). It's almost crazy how lighting can effect our moods!
We've been living with the same dull, unflattering light fixtures in some key areas of our home for 3+ years now and the difference the replacements have made is astounding to me. So why did we wait 3 years? Wires overwhelm me - I assumed it was a job much bigger than me and that it would involve researching what kind of light fixtures would fit where the old light fixtures were. It just seemed like one of those things that only super handy people or professionals could do. I was intimidated!
Luckily, after watching a couple YouTube videos of how to replace a light fixture, my nerves and worries were put to ease and I felt ready to go. Plus, Matt already knew a little about electric from an old construction job he had through college. Bonus!
After learning that I could pretty much put anything I wanted in place of our old fixtures, I hit up a few, (7), yard sales a few weeks ago with Shire to see what we could dig up. I found two fixtures that I really liked at $8 each - perfect for my first time trying this job out!
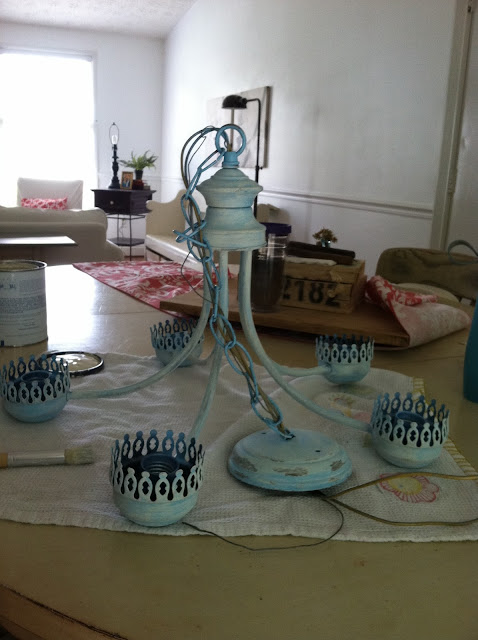
One was a brassy chandelier which I wanted to give an old, soft and layered finish. I spray painted the entire piece in a Rustoleum aqua spray paint. Once dry, I distressed with a piece of 120grit sandpaper. Then I wiped clean and dry-brushed Old White by ASCP.
Below you can see the difference between what the spray painted aqua looks like with and without the dry brushed Old White.
Dry brushing is when you dip just the tip of the brush in your paint, (wipe off excess against the edge of the can), then move your brush quickly and evenly over a small area.
Love how the dry brushing turned out, especially over top of the distressed areas. It just gives this simple chandelier so much depth and age. (It was all brass before, btw - sorry no before pic)
So that's how I refinished your average every day brass chandelier. Now on to the installation :)
This picture from Christmas a few years ago is the only decent one I could find of the original light fixture.
And after we installed my refinished brass chandelier
Ok, so the installation was SO EASY! First we unscrewed the original light fixture from the ceiling
This is what the wires looked like attached to the old fixture
We used our electric meter to make sure there was no electric current running through the wires. We had the switch turned off and wanted to be sure that did the trick!
Just touch each needle to a wire and checked the gauge.
No activity. Perfect!
We unwrapped the old fixtures wires from the wires coming out of the ceiling
Then wrapped the new fixtures wires around the wires coming out of the ceiling
Then reattached the red and black caps, (I don't know what they're called. Covers?).
At this point there may be a good chance you are left standing on the counter holding the new light fixture for about 10 minutes while your spouse tends to one of your little ones running around.
Then, using the screws that were already there before, attach the light fixture to the ceiling, (there is a then rectangular metal plate inside that hole in the ceiling that has holes where you will line up the screws).
Done!
I think I might actually enjoy washing dishes under this piece!
Here is another one we did:
Before
And after!
I know a lot of people could change their light fixtures practically blind-folded. This post is my humble attempt to show anyone like me who is less enthusiastic about open wires that it is actually a quick and simple DIY job!
Thanks for reading!
~Chelsea


No comments:
Post a Comment